Sunday, December 28, 2014

Honey and Pear Layer Cake with Honey Cream Cheese Frosting

I hope that you guys had a good time this Christmas. Edi and I spent most of the time with our families enjoying their company and the delicious food. My highlight were the traditional British Christmas treats Edi's mother had prepared for us: turkey, pudding and mince pies! Yesterday, we went to see my dad who also cooked a delicious dinner. At some point towards the end of the evening, though, my brother's girlfriend looked at me, with an exhausted look on her face, and said that she cannot not even look at any more food. And I don't know how you guys are feeling right about now, but one tends to reach a stage during December where one is glad that, after several Christmas dinners, everything goes back to the usual. However, I still do not want to deprive you of this scrumptious recipe. As usual, for our yearly Christmas dinner at mum's, dessert was my task. This honey and pear layer cake is perfect for festive occasions and it is most certainly a highlight on each dessert table. The caramelized pears complement the fluffy and spicy-sweet sponge wonderfully. And the frosting is devilishly good. Enjoy in thin slices only if you want to leave some room for Christmas cookies…


Recipe
(from the lovely and always reliable Cake Days by Tarek Malouf)

For the caramelized pears:
3 pears
20g butter
60g runny honey
40g sugar

For the dough:
4 eggs
120g sugar
40g brown sugar
120ml buttermilk
120g runny honey
120ml vegetable oil
1 teaspoon grated zest of a lemon
280g flour
1.5 teaspoons baking powder
1 teaspoon baking soda
1 teaspoon ground cinnamon
1 teaspoon salt

For the frosting:
100g soft butter
500g icing sugar
50g runny honey
250g cream cheese
optional: ground cinnamon and sugar pearls for the decoration

You either need 4 springform pans of 20cm diameter or you can also use 2 springform pans of 24cm diameter.

Preheat the oven to 170°C and line the springform pans with parchment paper.

For the pears: Peel and core the pears, cut in slices (not too thin). In a pan, heat butter, honey and sugar until melted. Add the pears and let cook until they are golden and soft. Don't let them cook too long or they will get too soft. Take away from the heat and let cool.

For the dough, put eggs and both sugars in a large bowl (I had to use a larger one than usual for this quantity of dough) and mix with an electric hand mixer until pale and fluffy. Mix buttermilk, honey, oil and lemon zest and add. Mix until well combined.

In another bowl, mix flour, baking powder, baking soda, cinnamon and salt. Carefully add to the wet ingredients in two steps.

Fill your dough into the prepared tins and arrange the caramelized pear slices on the dough in a circle.

Bake for about 25-30 minutes (depending on the size of your tins, it takes a bit longer with the 24cm tins). Test with a wooden skewer whether the cakes are done. If no dough sticks to them, they're done. Take out of the oven and let cool in the tins first. Then, release them from the tins and let cool on wire racks.

When the cakes are completely cool, you can prepare your frosting: In a bowl, mix butter and icing sugar with an electric mixer on low speed until you have a powdery batter. Add the cream cheese and the honey On high speed, mix until you have a fluffy batter.

Now, assemble your cake: Put one layer of the cake on a cake plate. Spread about 3-4 tablespoons of frosting on the cake. Cover with the second layer (and repeat if you have four layers). If this is your top layer, begin to frost the top and the sides of the cake with a palette knife. 


Wednesday, December 24, 2014

Merry Christmas!


This is just to wish you guys a merry Christmas.
Baking-wise, I haven't been as productive as in other years.
No extensive cookie-session. But, as you know,
there's a good reason for that. The little girl growing inside
my belly urges me to rest much more than usual.
But that's alright. Taking better care of myself
is something I have to learn anyway and a 
pregnancy teaches you just that. 

Wow, what a year this has been...
I sort of felt at the beginning of 2014 that something "big"
would be happening, but I still find myself overwhelmed
with how everything turned out. 
I wonder what the next year will bring. And although
I'm a bit nervous, too, I have no doubt that 
everything is going to be just fine.
And that's what I hope for all of you as well.
A huge thank you goes out to my friends and family
who where there for me during this exciting year.
I wouldn't know what to do without you.

Love, Katrin


Sunday, December 14, 2014

Apple and Cinnamon Crumble Tart

We had my mum and Wolfgang over for dinner tonight to say thanks for all their help. Seriously, I don't know how we would have survived without them during the past few weeks. Almost all the moving boxes have disappeared and our apartment is starting to look really cozy - just in time for Christmas. For dinner, Edi cooked a wonderful pork roast and, as usual, I took care of dessert. When browsing through my baking books, I had some sort of festive cake in mind. This recipe here sounded just right to me (besides, when can you ever go wrong with the combination of apples and cinnamon?!). With a dollop of whipped cream, a slice of this cake is just the right thing on a winter day.


Recipe
(slightly adapted from "Weihnachten mit Fräulein Klein")

for the dough:
125g soft butter
1/2 vanilla pod
110g sugar
2 eggs
125g flour
1 teaspoon baking powder
1 teaspoon ground cinnamon
1 teaspoon grated zest of an orange

for the apples:
2-3 apples (recipe says 4 mid-sized apples, 2 apples were enough in my case)
2 teaspoons ground cinnamon

for the crumble:
150g flour
90g brown sugar
100g butter, cold
1/2 vanilla pod

You can use either a round baking tin of 24cm diameter of a square one (11x35cm). 

In a large bowl, beat butter and sugar and the seeds of half a vanilla pod with an electric hand mixer until fluffy. Add the two eggs and beat again. Add zest of one grated orange and beat. In another bowl, combine flour, baking powder and cinnamon. Add this to your batter and beat until all is well combined. Fill this dough into your tart tin. 

Peel your apples (or don't, we were too lazy for that), core them and cut into 3-4mm slices. Put them into a bowl and combine with the cinnamon. Arrange your apple slices on the dough.

For the crumble, combine flour, sugar and scraped out seeds of a vanilla pod in a bowl. Dice the cold butter, add and with your fingers, rub until your have a crumbly batter. Scatter over your tart.

Bake the tart for about 40-45 minutes. If it tends to brown too much towards the end, cover with aluminium foil. Test with a wooden skewer whether your cake is done.

Take out of the oven, let cool. Dust with icing sugar before serving.

Notes:

  • While my cake was in the oven, I realized that I probably had a bit too much dough for my tin and it spilled over the edges while baking. Nothing to worry too much about, though. I just trimmed the not so nice looking edges with a knife after baking.
  • I also had too much of the crumble batter, so one could probably prepare a little less.
  • Fräulein Klein originally bakes this cake with speculoos spice instead of cinnamon. I even opted for cinnamon buds (Zimtblüte) which I like a lot.


Thursday, December 11, 2014

Gingerbread with Cranberry Icing

There are certain things that, for me, just belong to Christmas time. As for instance gingerbread. And not just any kind of gingerbread, but the one my mother used to make ever since I can remember. I dearly love this recipe. This year, I even opted for a fancy icing. I've spotted the recipe for the icing on Fräulein Klein's lovely website and it came back to my mind while I was having fun baking Christmas treats together with Edi's ever so cute daughter Jacqueline. Of course, the little girl was thrilled with the idea of a pink icing! She also took care distributing the blue sugar stars all over the gingerbread. We were really pleased with the outcome. The gingerbread is also really good just plain as it is (or with a little butter spread onto it - I swear that's delicious, try it!).


Recipe
(from the good old "Aargauer Rezepte" by Dora Schärer, Betty Pircher and Yvonne Fauser)

500g flour
500g sugar
3 tablespoons cocoa powder
3 tablespoons gingerbread spice mixture (I usually buy mine at MIGROS)
1 tablespoon baking powder
5dl milk
4 tablespoons vegetable oil (I usually use olive oil)

Line a large baking tray (ca. 40x35cm) with parchment paper. Don't preheat the oven.

In a large bowl, combine flour, sugar, cocoa powder, gingerbread spice mixture and baking powder. Combine milk and oil and add to the dry ingredients. Beat well with an electric hand mixer until you have a smooth batter. 

Fill your batter into the prepared baking tray. Put the tray into the oven and turn the oven on (180°C). Bake for about 30 to 40 minutes. I've made the experience that it's usually done after 30 minutes, but I guess that depends on the oven.

When your gingerbread is thoroughly baked, take out of the oven and let cool. You can serve it with or without icing. 

For the icing mix 100g icing sugar with 2-3 tablespoons cranberry juice. Spread over your ginger bread and decorate further with sugar stars or sugar pearls… Whatever you feel like.

Cut into squares and serve. The gingerbread can be stored in an airtight box for a few days.


Thursday, December 04, 2014

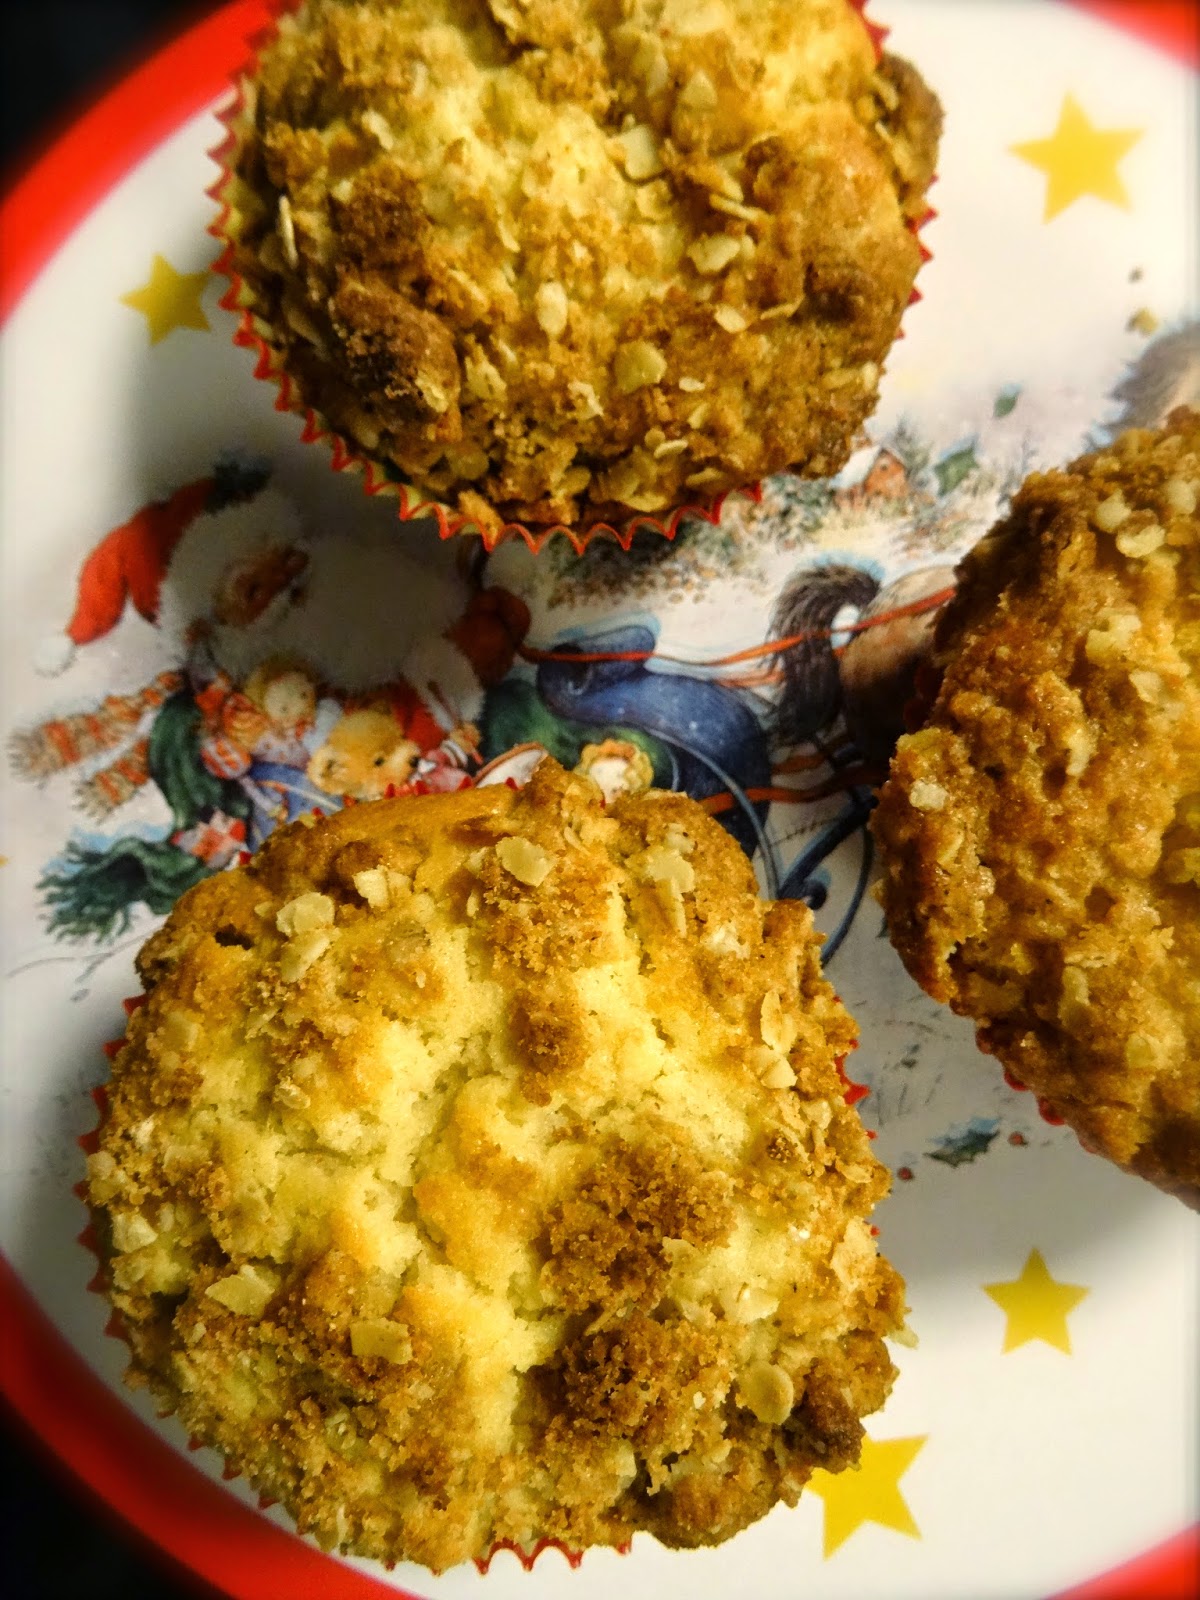
Pear and White Chocolate Muffins with Gingerbread Crumble

All of a sudden, December has arrived. And finally, I have moved into my new home. Our flat is still packed with cartons, though and we're trying to sort everything out. I just realized again, how stressful moving is. Good news is, I've already taken care of organizing the kitchen and, as you can see, I'm getting to know my new oven.

However, the move is definitely not the only reason why it's been so quiet around here the past few weeks. Ever since July, my whole life has changed. Our daughter is on the way and come spring, we're going to be be a little family. I couldn't be happier. Mother love is probably the most wonderful and overwhelming feeling I've ever experienced, and it's scary all the same. Still, I'm so looking forward to holding our little girl in my arms… And I hope that, during the next few weeks and months, I'll still have time to post a recipe from time to time. There's definitely some Christmas baking on the agenda!


Recipe
Adapted from: Leila Lindholm's Piece of Cake

100g butter
200ml milk
2 eggs
120g sugar
1tsp vanilla sugar or one teaspoon vanilla extract
240g flour
2tsp baking powder
1 pinch of salt
100g white chocolate, chopped into pieces
1 large pear, peeled, diced

crumbles:
75g cold butter
60g rolled oats
60g flour
80g sugar
1 teaspoon gingerbread spice-mixture

Preheat the oven to 200°C. Line a muffin tray with paper cases.

Melt butter, add milk. Beat eggs, sugar and vanilla sugar until foamy. Mix egg batter with milk batter. Mix flour, baking powder and salt and mix with the liquid batter. Add white chocolate and pears. Fill your mixture into thepaper cases.

For the crumbles: Cut butter into pieces and combine with the rolled oats, flour, gingerbread spice-mixture and sugar. Spread the crumble onto the muffins.

Bake for about 20 minutes.

Tuesday, October 14, 2014

Corn Bread with Olives

I always say that I would like to bake more bread. And yet, I hardly ever do it. However, when I stumbled over this recipe, I decided to give it a try. I actually like corn bread a lot, but was much more used to the sweeter version with raisins or chocolate chips. This savory version is delicious as well. We had it for dinner lately together with cheese and dried meat. This bread is probably best on the day it was baked or the day after since it tends to get a bit dry after that.


Recipe
(from LE MENU 10/2014)

2dl milk-water mix (1dl milk, 1dl water)
1/4 teaspoon salt
50g polenta (not too coarse)
325g flour
1 teaspoon salt
15g yeast
about 2dl lukewarm water
100g black or green olives, stones removed, cut into slices
some more flour to dust the surface

For a cake tin of about 28cm length.

In a small pan, heat up milk-water with the salt and bring to a boil. Add Polenta while stirring constantly and simmer for about 6-10 minutes until you've got a creamy polenta. Set aside, let cool a bit.

Mix flour and salt. Dissolve yeast in a little water and then, together with the rest of the water and the polenta, add to the flour and knead until you have a smooth dough. In a large bowl and covered with a kitchen towel, let the dough rise until it's got about double its size.

Dust your kitchen surface with flour, take your dough, flatten a bit. Scatter the olives on the dough and press them into the dough a little. Roll the dough up and place your loaf into your cake tin lined with parchment paper and dust with a bit of flour. Let the dough rise for another half hour.

Preheat your oven to 230°C. Place the tin onto a baking tray together with a little heat-proof bowl of water. Bake your loaf for about 10 minutes. Then reduce to heat to 180°C and bake for another 30 minutes. Then, release your loaf from the cake tin, put it back in the oven and bake for another 10-15 minutes.


Monday, September 22, 2014

Nutella Muffins

Hey you guys. I'm so sorry for abandoning you for such a long time. This year, it seems, I do not have as much time for baking as I would like to. Last weekend, though, I made it back to the kitchen and I've got a real treat for you. This recipe ought to be a reasonable compensation for my two-month absence. These muffins are popular with children and adults. I've had "test persons" whose age ranged from three to fifty-something and they were all equally thrilled.


Recipe:
(from the fabulous Cake Days by Tarek Malouf)

for 12 muffins (I got 16 muffins out of this recipe)

300g flour
1 tablespoon baking powder
1/2 teaspoon baking soda
150g sugar
1 sachet vanilla sugar
1/4 teaspoon salt
250ml milk
2 eggs
85g butter, melted
150g Nutella
30g hazelnuts, chopped

Preheat the oven to 170°C. Line your muffin pan with paper cases.

In a large bowl, sift together flour, baking powder, baking soda, 120g sugar, vanilla sugar and salt. In a small bowl, combine milk and eggs. Add the milk-egg-mixture to the flour-mixture and beat well with an electric hand mixer. Scrape down your bowl with a ladle. Add the melted butter and then 80g of Nutella. Beat well.

Fill about a fourth of each paper case with the dough. Then, drop a teaspoon of Nutella into each muffin case. Fill the rest of the dough into your muffin cases until their filled up to about two thirds. Sprinkle the chopped hazelnuts and the remaining sugar onto your muffins.

Bake your muffins for about 30 minutes in the middle of the oven. Test with a wooden skewer whether they are done. No dough should stick to the skewer. Let the muffins cool in the tray for a few minutes, then let cool on a wire rack.


Sunday, August 03, 2014

Baileys Brownies with Hazelnut Topping

When Nadina and Matthias invited me over for dinner this weekend, I insisted on bringing dessert. They asked me whether I could bring along something with chocolate. They are currently both finishing their final university papers and seemed in desperate need of comfort food. Brownies, of course, were the first thing that came to my mind. So I began to browse through my baking books in search of a brownie recipe I hadn't tried before. And I found one. You want comfort food?! I give you comfort food. As for consistency, these brownies are just what brownies should be like. The flavor of the Baileys goes wonderfully with the dark chocolate and a hint of coffee. Final touch: the hazelnut topping. 


Recipe
(from the wonderful Sweets by Nicky Stich)

200g dark chocolate
150g butter
1/2 teaspoon coffee powder
3 eggs
150g brown sugar
50g white sugar
1/4 teaspoon ground cinnamon
1/4 teaspoon salt
125g flour
25g cocoa powder
60ml Baileys
50g chopped hazelnuts

Preheat the oven to 190°C and line a brownie tin (about 20x20) with parchment paper.

Coarsely chop the dark chocolate and, together with the butter and the coffee powder, melt over a hot water bath in a metal bowl, stirring occasionally. 

In another bowl, lightly beat the eggs. Add the sugar and beat for at least 3 minutes until creamy. Add chocolate-butter-mixture, cinnamon and salt. Then, sift in flour and cocoa and mix. Then, add Baileys and beat until all is well combined.

Fill your dough into the prepared tin and smoothen with a ladle. Then, sprinkle the chopped hazelnuts on top. Bake in the middle of the oven for about 25-30 minutes. They should not be thoroughly baked, otherwise, they will go dry too soon. If the middle is still a bit wobbly at the end of the baking time, that's perfect.

Let cool in your tin first, then release from the baking tin and let cool completely.


Sunday, July 20, 2014

Little Apricot Cakes

Evelyn invited me over to her place yesterday and we spent some time just talking and enjoying the beautiful view from her balcony. I love these afternoons. I usually return home relaxed and nourished, both from the valuable conversation and from the delicious food. As usual, Evelyn took care of cooking us dinner and I was in charge of dessert. Since I did not have that much time to bake in advance, I decided on a quick and easy recipe. But aren't these little cakes cute?! They're delicious, too. You could make them with other fruit if you want to, but for me, it had to be apricots.


Recipe:
(from the fabulous "Home Made" by Yvette van Boven)

150g ground almonds
150g flour
180g butter, melted and cooled a little
150g sugar
6 egg whites
1 pinch of salt
12 apricots (you can use other fruit, too. The original recipe suggests to bake these with very small apples.)

Preheat the oven to 180°C. For this recipe, I suggest, you rather use firmer paper cups (like those on the fotos) than the usual muffin paper cups or you bake them in your muffin pan without paper cups and just butter then moulds well. Maybe you have oven-proof ceramic pans, that would work, too. The cakes can easily be released when they have cooled down.

In a large bowl, mix all the ingredients (I first mixed the dry ingredients, then added the melted butter and the eggwhites) except for the fruit.

Fill your dough into the prepared cups. Press one apricot into each cup. By the way, if you want to, you can half the apricots first, remove the core and then put the halves back together again and press into the dough then. I tried both methods and thought that, the cakes with the apricots left whole looked better.

Bake for about 30-40 minutes until golden brown.


Monday, July 14, 2014

Chocolate Layer Cake with Chocolate Coffee Buttercream Frosting

I've baked a number of cakes for Edi over the past few months and those of you who know Edi's and my story better also know that it's not totally made up out of thin air when I say that it was probably even cake that caused us to get to know each other better in the first place. For his birthday, of course, a special cake was in order and I went for something I've never tried before: a layer cake. With a to-die-for buttercream frosting. I'm extremely happy with the outcome and also with the cute decoration which is quite easy to make (see below). So this post goes out to Edi. Happy Birthday. I'm so thankful to have you by my side.


Recipe:
(Cake: from I love Cake by Trish Deseine / buttercream: from What Katie Ate by Katie Quinn Davis)

225g soft butter
225g sugar
4 eggs
225g flour
4 tablespoons cocoa powder (dissolved in about 4 tablespoons hot water)
2 teaspoons baking powder

for two 20cm diameter springform pans

Preheat the oven to 180°C and line your springform pans with parchment paper.

Mix all ingredients in a large bowl with an electric hand mixer until smooth. (The recipe says exactly this. I added the ingredients in stages nevertheless, beating inbetween. First the butter and the sugar, then the eggs, then the flour and baking powder, then the cocoa powder.

Fill your dough into the prepared springform pans and bake for about 25 minutes. Test with a wooden skewer whether they are done. No cake batter should stick to the wooden skewer.

Take out of the oven and let cool. You can easily prepare this one day ahead.

When the cakes have completely cooled. Trim off just a little bit of the rounded tops with a sharp knife so that they have flat surfaces for the buttercream.

Prepare your buttercream:

300g butter, softened
155g icing sugar (I used more to make the buttercream a bit thicker)
170g dark chocolate
1 teaspoon vanilla extract
1 tablespoon strong coffee (or instant coffee)

In a bowl, beat butter and icing sugar until smooth and creamy.

Meanwhile, bring a small saucepan of water to a gentle simmer and melt the chocolate in a small heatproof bowl that fits snugly over the pan without touching the water, stirring occasionally.

Remove from the heat and add the vanilla and coffee to the melted chocolate and combine; it will start to become lumpy, but don't worry. Add this to the butter and sugar mixture, beating gently until glossy and smooth.

Use a spatula to spread the butter cream on top of the first cake and spread it out towards the edges. Place the second cake on top, then ice the top and the sides of the cake. 

Then, decorate just the way you like. I used rose petals which I dipped into a small bowl of two lightly beaten egg whites and then covered with sugar. You should do this the day before and let dry over night.


Sunday, July 06, 2014

Blackberry and Hazelnut Cake

I love all those wonderful red, pink and blue summer berries… At the moment, I can't walk through the fruit and vegetable section of my grocery store without having to pick one or two of those little berry baskets. This weekend, some sort of berry cake was definitely in order. This is a very good basic recipe you can adapt according to your taste. You can choose whatever sort of berries you like and if you want to, you can exchange the ground hazelnuts for ground almonds. I suppose, a handful of dark chocolate pieces would work as well. I added some fresh ginger - to have another flavor experiment. Just go with whatever you feel like. Lately, I really try to encourage my friends to just have a little more courage when baking cakes. Of course, it's about experience. And you'll get that by trying. You'll develop a feeling for things. And you should never forget that it has something to do passion. To me, that's still the most important part. If you let yourself lead by that, you can't go wrong.


Recipe
(slightly adapted from "Heissgeliebtes Backen" by Annemarie Wildeisen and Florina Manz)

250g soft butter
150g sugar
1 tablespoon of vanilla extract
4 eggs
250g flour
1 teaspoon baking powder
75g ground hazelnuts
a pinch of salt
if you like: one small piece of fresh ginger
250g blackberries

For a cake tin of 30cm length or a round springform pan of 24cm diameter. I halved the above recipe and used a 18cm diameter springform pan.

Preheat the oven to 180°C, line your cake tin with parchment paper and grease with butter.

In a large bowl, mix butter with an electric hand mixer until soft and fluffy. Then, add sugar and beat again. Add vanilla extract and eggs and beat again until all is well combined. 

In another bowl, mix flour, baking powder, salt and hazelnuts and add to your butter-egg-sugar mixture. Mix until all is well combine. Add some grated ginger (how much depends on your taste). Then, add your blackberries and mix with a ladle.

Fill your dough into the prepared cake tin and bake for about 50 minutes. A wooden skewer inserted into the cake should come out clean. If your cake browns too much towards the end of the baking time, cover with aluminium foil. Take out of the oven and let cool in the tin first. Then, release and let cool on a wire rack. Dust with icing sugar before serving.


Sunday, June 29, 2014

Cherry and Vanilla Cake with Walnuts

Well, here I am again. It's been almost a month, I know. But, you guys, there's just so much going on at the moment, I'm having a hard time catching up with everything, let alone take some time for blogging. And I've stopped to squeeze that in just because I think I have to. Baking cakes in a hurry usually leads to unsatisfying results and to uninspired photos which are not worth posting. But today is a slow day. One of those rainy sundays. Perfect occasion to take up blogging again. Here comes a cake I created from several recipes in one of my favorite books. I wanted to bake something with cherries. And you know me by now, I always have to add spices. This time, I went for vanilla because that goes so well with cherries. The sour cream in the dough renders this cake moist and the walnuts give it a crunch. Crumbles on top, now who doesn't love that?!


Recipe
(slightly adapted from one of my new favorites: The Hummingbird Bakery - Süsse Sünden)

190g soft butter, plus some more for greasing the pan
190g sugar
3 eggs
190g flour, plus some for the pan
1 teaspoon baking powder
1/4 teaspoon salt
25g sour cream
seeds of one vanilla pod
ca. 100g cherries, pitted, halved
50g walnuts, coarsely chopped

For the crumble:
25g flour
10g cold butter
15g sugar
20g chopped walnuts


Preheat the oven to 170°C (convection oven 150°C). Grease a 20cm cake tin and dust with flour.

Put all the ingredients for the crumble into a small bowl and rub together with your fingers until you have crumbles. Set aside.

In a bowl, beat butter and sugar until fluffy. Add the eggs one by one. Scrape down the bowl with a ladle from time to time.

Sift flour, baking powder and salt into a bowl. Add the flour to the fluffy batter in two portions. When all is well combined, add sour cream and vanilla. Then, add the walnuts and incorporate with a ladle. In the end, add the cherries.

Fill your dough into the prepared tin. Scatter the crumble over your cake. Bake in the middle of the oven for about 50 minutes. Test if the cake is done by inserting a wooden skewer. If it comes out clean, the cake is done. Let cool in the tin first. Then, release from the tin and let cool completely.


Sunday, June 01, 2014

Rhubarb and Almond Muffins

So I gave some of my photos a second chance. Remember, I told you last time that I have become quite a stickler when it comes to my food photos. This morning though, I browsed through last month's pictures again and thought what a pity it was that I haven't posted these delicious muffins. And I even discovered some photos that, at second glance, I liked quite much. So here they come. Almond and rhubarb - winner combination. And the almond topping adds a sweet crunch to those wonderfully tender and moist muffins.


Recipe 
(available in German: here)

for the dough:
400g rhubarb
150g sugar
100g butter
125g flour
100g ground almonds
2 teaspoons baking powder
2 eggs
100 sour cream or crème fraiche

for the topping:
50g butter
50g sugar
50g heavy cream
100g slivered almonds

For 12-16 muffins.

Wash and peel the rhubarb. Cut into pieces of about 0.5 - 1cm. Put in a bowl and mix with 2 tablespoons of sugar.

For the dough, melt butter in a small pan over low heat. Take the pan away from the heat and let the butter cool a bit. In a bowl, mix flour with the ground almonds and the baking powder.

For the topping, pour heavy cream, sugar and butter into a pan, let melt together and cook for about a minute. Add slivered almonds and let cook for further one or two minutes, until the mixture is not too liquid anymore.

Preheat the oven to 180°C and line your muffin pan with paper cases.

In a bowl, mix melted butter and remaining sugar with an electric hand mixer. Add the eggs, one after the other. Then, add sour cream.

With a ladle, fold in your flour mixture. Drain the rhubarb pieces, then add to the dough and mix. Fill your dough into the prepared muffin cases. Add a bit of topping onto each muffin.

Bake for about 30 minutes until they are golden brown. If the almond topping browns too much, cover with aluminium foil. Then, take out of the oven and let cool.


Sunday, May 18, 2014

Pear and Hazelnut Muffins

Good morning, everyone. I know, it's been a while. But during the last few weeks, I either didn't have time for baking or the photos I made of my cakes did not live up to my expectations so I decided not to post them. When it comes to my food pictures, I've become quite a perfectionist. So I often find myself sitting in front of my computer, looking at the photos for ages, comparing and post-processing them until I feel comfortable with the result. Sometimes, the first few shots I take are just perfect and sometimes, it just doesn't work the way I wanted it to, no matter what I try… I am quite happy with the outcome of today's photo session, though. I felt like baking something with pears. Pear still is my favorite fruit and combined with hazelnuts or almonds it yields, at least in my opinion, the most comforting and heart-warming baked goods. These muffins would be wonderful for breakfast or as a snack in the afternoon.


Recipe
(from here)

Yield: Theoretically, 12 muffins (I got 17)

2 small-medium firm pears
85 grams butter, melted and cooled slightly
125 grams natural cane sugar, such as Turbinado, light brown or granulated sugar
240 ml buttermilk
2 large eggs, lightly beaten
1 to 1 1/2 teaspoons vanilla extract
75 grams rolled oats
125 grams all-purpose flour
60 grams whole wheat flour
3/4 teaspoon baking soda
2 teaspoons baking powder
1/2 teaspoon ground cardamom, which I replaced with 1/4 teaspoon cinnamon
1/2 teaspoon ground nutmeg, which I replaced with 1/4 teaspoon freshly grated
3/4 teaspoon kosher salt
120 grams toasted hazelnuts, coarsely chopped
85 grams bittersweet chocolate chunks (optional, I left them out)

Heat oven to 220°C. Butter a standard 12-cup muffin tin or line it with papers.

Peel (if you so desire, can be skipped) pears, then halve and core them. Grate pears on the large holes of a boxed grater into a large bowl. Stir in melted butter, sugar, buttermilk, eggs and vanilla until combined.

In a separate bowl, stir together the oats, flours, baking soda, baking powder, spices, salt, all but 1/2 of the coarsely chopped hazelnuts, and chocolate chunks, if you’re feeling extra indulgent. Gently fold this dry ingredient mixture into the wet batter until just combined; do not overmix.

Fill muffin cups almost up to the top and sprinkle with the reserved hazelnuts. Place muffins in oven and immediately reduce the heat to 190°C. Bake for 20 to 25 minutes, or until the tops are golden brown and a toothpick inserted into the center of muffins comes out batter-free.

Cool muffins in pans for 10 minutes, then transfer to a cooling rack. Muffins will keep for 2 days at room temperature in an airtight container.


Sunday, April 27, 2014

Matcha and Lime Cookies

Next to the colored eggs and my Easter bunnies, I also made these green little cuties last weekend. I just didn't have time to post them here yet since I've been away on holiday for a few days last week. At a car racing training in Germany, can you believe it?! Co-driver only, of course, but guys, that was quite a ride. And now that Edi brought me home in one piece, I finally have time to share this recipe with you. I had bookmarked it in one of my cookbooks ages ago and ever since I've cleaned out my kitchen cupboard and found my tin of matcha powder again, I've been wanting to give this recipe a try. I thought that these cookies would make nice Easter goodies. They get their bright-green color from the matcha powder which, in Switzerland, you can get in Asia shops. Color-wise, matcha and lime are the perfect combination and their flavors go together wonderfully. Complex and bitter versus fresh and sweet - builds a perfect harmony.


Recipe
(from Delicious Days by Nicole Stich)

80g icing sugar
2 teaspoons matcha powder
3 limes
150g cold butter
1 pinch of salt
200g flour
25-50g corn starch
3 egg yolks
75g sugar

Sift icing sugar and matcha powder into a large bowl. Wash one of the limes with hot water and grate the zest. Cut butter into cubes and, together with the lime zest and salt, add to the sugar. With your electric hand mixer (I used the dough hook), mix until you have a bright-green smooth dough. Then, add flour and corn starch. Mix again. Then, add the eggs.

Form the dough into a flat disk and wrap into cling film. Put into the refrigerator for at least one hour. You can also leave this dough in the fridge for about 2 days.

Preheat the oven to 170°C (fan-assisted: 150°C) and line two baking trays with parchment paper. Wash the other two limes with hot water, grate the zest and grind in a mortar together with 1 tablespoon sugar. Mix with the rest of the sugar and put into a bowl.

Dust your work surface with a little flour and roll out your dough (about 5-7 millimeters). Cut out your cookies with a cookie cutter of your choice. Toss the cookies into your sugar-lime mix until they are covered with lime sugar. Align the cookies in the tray and bake in the middle of the oven. Depending on how thick the cookies are, that takes 10-15 minutes. They should be baked thoroughly, but they should not be brown around the edges. Take out of the oven and let cool on a wire rack. Keep in an air- and light-tight container.


Sunday, April 20, 2014

Happy Easter!

Friday afternoon at Sibylle's was a blast. I just loved spending time with her family in their cozy little house. She's a wonderful host and a big thank you goes out to her - we all had such a great time. And on the pictures below, you can see some of the beautiful eggs we colored. Sibylle had also made a delicious plaited loaf and it reminded me of how much I actually like to bake bread. Since it's Easter, I decided to make little bunnies instead of a plait. One of these is going to be a little Easter present for Edi, my one and only. Time to formally introduce the man to you guys since, for quite some time now, he's been such a precious part of my life. It all started with me bringing cake over to his office - which is why I usually jokingly tend to claim that I've enchanted him with cake. Cooking or baking for your loved one just is a wonderful thing. I truly believe that all the love and affection goes into the food. Well, Liebe geht durch den Magen, or how do you say in English?! The way to a man's heart is through his stomach.


Recipe
(from Betty Bossi - Knuspriges Brot und köstliche Brotgerichte)

Makes four bunnies:

500g flour
1/2 tablespoon salt
ca. 15g yeast, in crumbs
1/2 tablespoon sugar
125g soft butter
3 - 3.5dl milk
1 egg yolk
a splash of cream

In a large bowl, mix flour and salt. Add yeast, sugar, butter and milk and knead (with the kitchen aid or with your hands) until you have a soft and smooth dough (if you do it with your hands like I did, it takes about 10 minutes). Form a ball, put into your bowl and cover with a kitchen towel. Let the dough rise in a warm place until its size has doubled (about 2 - 3 hours).

Spread a little flour on your kitchen surface. Cut your dough into four equal pieces. Roll each piece into a long thick strand. Then, cut off about a fourth of the strand to form the bunny head. Form a ball and with a knife or with scissors, make a cut to make the bunny ears. To make the body of the bunny, make a knot into the longer strand. Line a baking tray with parchment paper. Put the two "body parts" onto the tray. The head and the body will stick together better if you use a little water on the spot where they come together. Repeat for the other three bunnies and let them rise again for another half hour.

Preheat the oven to 200°C. Use a raisin to make a bunny eye. In a small bowl, mix egg yolk and cream and brush onto your bunnies. Bake them in the middle of the oven for about 25 minutes. If you take them out of the oven and knock onto the bottom with your finger, it should make a hollow sound. Let cool on a wire rack.


Friday, April 18, 2014

Vanilla Cupcakes

Is it Easter already again?! Time flies, doesn't it? But I've been having a slow start today and I'm looking forward to a few days off now. This afternoon, I'm going to go over to Evelyn's sister Sibylle. As usual, she has invited her family and a bunch of other people to her house for the annual Easter egg coloring session. Last year, it was big fun and I have no doubt that we are going to have a great time today as well. I just finished decorating these cupcakes which I'm going to bring along for the dessert buffet and I thought, I might just have time to share them with you before I have to leave. Happy Easter you guys!


Recipe
(from one of my absolute favourites: Cake Days by The Hummingbird Bakery)

For the dough:

80g soft butter
280g sugar
1/2 sachet of vanilla sugar
240g flour
1 tablespoon baking powder
1/4 teaspoon salt
2 eggs
240ml milk

Preheat the oven to 190°C. Line a 12-mould muffin pan with paper cases.

In a bowl, mix butter, sugar, vanilla sugar, flour, baking powder and salt with an electric hand mixer on low speed until you have a fine crumbly batter.

Mix milk and eggs and add to the cake batter in three additions while constantly mixing. Scrape down the bowl with a rubber spatula from time to time. Mix until you have a smooth batter.

Fill your batter into the prepared cases. Don't overfill them or they will spill while baking! Two thirds is fine. Bake in the middle of the oven for about 20 minutes. Check with a wooden skewer whether they are done. Let cool completely after baking.

For the frosting:

500g icing sugar
1/2 sachet of vanilla sugar
160g very soft butter
50ml milk

In a bowl, mix butter, icing sugar and vanilla sugar with an electric mixer on low speed until you have a powdery batter. Slowly add the milk while constantly mixing. On high speed, mix until you have a fluffy batter.

Spread the frosting on your cupcakes with a palette knife and decorate with sugar flowers or sugar pearls… whatever you feel like or fits for the occasion.


Monday, April 14, 2014

Crème Fraiche Cake with Raspberries

I've been having doubts about my cake karma this weekend. The recipe sounded delicious. It's one of those that instantly attract my attention. I mean, crème fraiche cake. Also, it looked like total no-fuss recipe. And it was - until I released my cake from the baking tin. All the berries had gone to the bottom, they were oozing and the cake kind of sunk and lost its shape while I was decorating it with the icing. Well, it wasn't that bad, but I'm a perfectionist. And I've truly made better looking cakes... But in the end, it was still delicious and I even managed to get a few nice shots. So I decided to share it with you anyway. Since I still don't exactly know what went wrong, I can't give you any precise advise on this one. Just make sure your cake is baked thoroughly. I might have taken it out of the oven too early. And you might want to try and use frozen berries. Maybe the result will be better.


Recipe
(again from the wonderful Zucker, Zimt und Liebe by Virginia Horstmann)

for the dough:
175g flour
1 teaspoon baking powder
1 pinch of salt
1 pinch of baking soda
115g softened butter
150g sugar
2 eggs
(I added the scraped out seeds of a vanilla pod)
200g crème fraiche
200g raspberries (frozen work as well)
2 tablespoons brown sugar

for the glaze:
100g icing sugar
1-2 tablespoons milk

Preheat the oven to 175°C and line a 25cm cake tin with parchment paper.

In a large bowl, combine flour, baking powder, salt and baking soda. Set aside. In another bowl, beat butter and sugar with an electric hand mixer until pale and creamy. Add the eggs, one after the other. Beat until well combined. Add vanilla seeds if you want to.

Add about a third of the flour to the creamy mixture, keep mixing. Then, add some of the crème fraiche and mix. Keep alternating between the two while constantly beating and until everything is well combined. Then, carefully, add the raspberries and fill the dough into your prepared tin. Sprinkle with the brown sugar.

Bake for about 60-70 minutes. Cover with aluminium foil if it browns too much during the last third of the baking time. Test with a wooden skewer whether your cake is done. The skewer should come out clean. Take out of the oven and let cool.

When your cake has cooled, release from the tin. For the icing, combine icing sugar and milk in a small bowl. With a spoon, spread over your cake.


Wednesday, March 26, 2014

Rhubarb Cake with Almonds

2014 has been treating me well so far. Sometimes, it's just wonderful how life surprises you if you just let it. In fact, I'm still so overwhelmed from all the good that has happened to me in the past few weeks that I don't know what to say. But I have a delicious recipe to share with you. Rhubarbs are in season. It's spring in my kitchen - and in my heart.


Recipe
(from the lovely Zucker, Zimt und Liebe by Virginia Horstmann)

100g flour
1 pinch of salt
1 teaspoon baking powder
150g soft butter
150g sugar
2 eggs
200g ground almonds
400g rhubarb, washed, peeled, cut into pieces of about 5cm or so
2 tablespoons slivered almonds
1 tablespoon brown sugar

Preheat the oven to 180°C, line a 20cm diameter springform pan with parchment paper and grease with butter.

In a bowl, combine flour, salt and baking powder and set aside. In another bowl, mix butter and sugar with an electric hand mixer until pale and creamy. Then, add the eggs, one by one. After that, add the flour and the ground almonds. Mix until well combined.

Fill the dough into your prepared springform pan and spread the rhubarb on top of it in a fanlike kind of way. You could, of course, also cut the rhubarb stalks into dices and just scatter them on top of your cake. Then, scatter the slivered almonds on top and sprinkle with the brown sugar.

Bake for about 60 to 70 minutes. If the cake browns too much towards the end, cover with aluminium foil. Then, take out of the oven and let cool. Dust with icing sugar before serving if you like.


Related Posts with Thumbnails