Sunday, December 30, 2012

Orange Cake

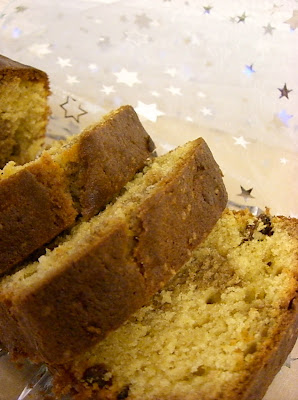
As usual, dessert is my part when it comes to our family Christmas dinner. I was really looking forward to sharing these pictures with you! I'm really proud of this cake! Isn't it an eye-catcher?! Good news: It's not that difficult to make. And it's delicious! After baking, the cake is soaked in orange syrup. It's wonderfully dense and moist. It's rather sweet, but not all that heavy. I - as you might guess - love it served with a dollop of whipped cream ;-)


Recipe
(from one of my favourite books: I love Cake by Trish Deseine)

4 eggs
220g sugar
150g flour
1 teaspoon baking powder
150g butter, melted
120g ground almonds
1 teaspoon grated lemon zest

for the syrup:
225g sugar
125ml water
2 or 3 oranges, washed and cut into thin slices

Line a 20cm diameter springform pan with parchment paper and grease well with butter (also line the rim with parchment paper!). Preheat the oven to 160°C.

For the syrup, pour the sugar and the water into a large pan and heat it up while constantly stirring. When the sugar has dissolved, add the orange slices and let simmer for about 10-15 minutes until the oranges are soft but still keep their shape. Take the pot away from the heat and drain the orange slices. Keep the syrup for later.

Put the eggs and the sugar into a large bowl and beat with an electric mixer for about 8-10 minutes until you have a creamy and thick batter about three times the volume of before.

Sift in flour and baking powder and fold in gently (I did it with a rubber spatula). Then, add the melted butter, the almonds and the lemon zest. Fold in until all is well combined.

Now line the rim and the bottom of your springform pan with the orange slices. Fill in the batter and bake for about 50 minutes. Check with a wooden skewer whether your cake is done. There shoul be no dough on the skewer. I left my cake in the oven for about 60 minutes.

Take the cake out of the oven and let cool for about 15 minutes or so. Then, release from the springform pan and turn it over.

Pour over some of the remaining orange syrup. Let cool completely before serving. If you have any leftover syrup, you can serve it together with the cake.


This is my last post this year. My 2012 was great - exciting and fast-paced, sometimes demanding, with an unexpectedly quiet end that gave me time to slow down. It made me realize that it can't hurt to take a break every now and then. I had wonderful moments with my friends and family this year. I got to know new people that grew dear to my heart and I'm looking forward to seeing them again in 2013. I don't know about you, but I have a feeling that it's going to be a good year. I wish you all a good start next week!


Monday, December 24, 2012

Merry Christmas


This is just to wish you all a merry merry Christmas.

And to say thank you to all my friends who have been there
for me - especially in the past 4 weeks. 

I am so lucky to have you.

Lots of love
Katrin

Sunday, December 23, 2012

Spice Cookies

I have been looking for old fashioned cookie molds this winter and I didn't find any. I was all the more happy when I found out that my grandma still has these kind of molds. She lent them to me and yesterday, I finally turned on the oven again after almost a month. Feels good :-) I'm really fond of these cookies. They taste delicious and don't they look cute?! Stay tuned next week for some more pictures and of course, for the cake I made this morning for our family christmas dinner tomorrow evening.


Spekulatius
(from: Betty Bossi - Backen in der Weihnachtszeit)

120g butter, soft
120g brown sugar
1 pinch of salt
1 egg
60g ground almonds
grated zest of one lemon
1 teaspoon cinnamon
1 pinch of ground cardamom
1 pinch of ground cloves
250g flour
1 teaspoon baking powder

In a large bowl, beat the butter until smooth. Add the sugar, salt and the egg and beat until the batter is pale and smooth. Add almonds, lemon zest, cinnamon, cardamom and cloves and mix well. Add the flour and the baking powder and bring together to a dough. Form a large ball and flatten it a little with your hand. Wrap in clingfilm and cool for about 30 minutes.

Preheat the oven to 200°C. Roll out portions of the dough on a floured surface or between two layers of cling film (about 7cm thick). If you have molds, press them into the dough and cut it around the edges with a knife or, if they are round, with a glass or a round cookie cutter a bit larger than the mold. If you don't have these old fashioned molds, just use the usual cookie cutters. Put the cookies on a tray lined with parchment paper. Cool for another 10 minutes.

Bake the cookies for about 10 minutes in the middle of the oven. Take them out of the oven. Let cool on a wire rack.

They keep, in an airtight container, for about 2 weeks.


Thursday, December 20, 2012

Cinnamon Marble Cake

I know, I have not posted a single cookie recipe this December and to be honest, I am not even sure whether there is going to be a cookie session at all. But guys, sometimes, less is more and there were other things that needed to be taken care of this month. I'm sure there will be plenty of time for baking next year and who knows... I might turn on the oven this weekend. For now, I have a really simple and wonderful cake recipe for you that I tried out in the first week of December. By using cinnamon instead of cocoa powder and adding handful of raisins, you can turn a marble cake into the perfect Christmas treat.


Recipe
(from: Süsse Sünden - Tarek Malouf)

190g soft butter, plus a little to grease the cake tin
190g sugar
1 sachet of vanilla sugar
3 eggs
190g flour, plus a little more for the cake tin
1 teaspoon baking powder
1/2 teaspoon salt
25g sour cream
1 tablespoon ground cinnamon
70g raisins

Preheat the oven to 170°C (convection oven: 150°C). Grease a 20cm cake tin with butter and dust with flour.

Beat butter, sugar and vanilla sugar with an electric mixer until fluffy. Add the eggs one by one. Scrape down the bowl from time to time with a ladle.

Sift the flour, baking powder and salt together into another bowl. In two additions, add the flour mixture to the fluffy mixture and mix well. Then, add the sour cream.

Put about 200g of the dough into another bowl, add the cinnamon and mix well. Add the raisins to the other remaining dough. Fill the dough with the raisins into your prepared cake tin first. Then, add the cinnamon dough. Run through it with a fork and swirl it around a bit to create the marble effect.

Bake the cake in the middle of the oven for about 50-60 minutes. Test whether it's done with a wooden skewer. If there is no dough on the skewer, your cake is done.


Monday, December 03, 2012

Sweet Potato Soup with Dried Apricots

It's way too cold outside... and the weather forecast said something about heavy snowfall today. Therefore, I decided to post another warming soup recipe before I'm going to start with this year's Christmas baking session. I like sweet potatoes very much, and I was intrigued by the idea of adding dried apricots to a soup. It totally worked for me, the dried apricots add an extra something to the flavor.


Recipe
(Original in German: here)

Ingredients for 2-3 servings:
1 tablspoon butter
1 red pepper
1-2 big sweet potatoes
2 teaspoons mild curry powder
50g dried apricots, diced
5dl vegetable stock
salt and pepper
2 tablespoons greek yoghurt or sour cream

Peel the sweet potatoes. Cut the sweet potatoes and the pepper into dices. In a saucepan, heat the butter and add the curry powder. Add the pepper and the sweet potato and sauté at medium heat for about ten minutes. Add the diced apricot, mix well and sauté for another 10 minutes. Add the vegetable stock and let simmer for about 15 minutes. Then, purée and add the yoghurt. Season with salt and pepper. Add some thyme leaves if you like and serve.


Wednesday, November 28, 2012

Chestnut Soup

I've mentioned already that I love chestnuts, haven't I?! Not only can you use them to make wonderful cakes or muffins, but also to make soups. Soups are the perfect comfort food when the days get colder. This fall, I have a favorite soup recipe and, of course, I want to share it with you. For me, this is one of those recipes you don't only cook once. You don't have a endless list of ingredients and the cooking part is so easy that there is not even a need to have the recipe at hand. If you also like chestnuts, try this recipe! I wouldn't serve it as a starter, though. It's really nourishing and makes a nice casual dinner for itself - for friends, or just for yourself.


Recipe
(from: Coopzeitung 44/2012)

1/2 tablespoon butter
2 onions, finely chopped
1 tablespoon sugar
400g frozen chestnuts, let them unfreeze before cooking the soup
8dl water
1/4 teaspoon salt
a pinch of pepper
1 dl cream, if you like

Let the butter melt in a large pan. Add the sugar and sauté for about 2 minutes. Add the chestnuts and sauté for another 2 minutes. Then, add the water, reduce the heat. Let the soup simmer for about 25 minutes. Purée the soup, season with salt and pepper according to your taste. If you like, beat the cream until fluffy and serve the soup with a dollop of cream.


Saturday, November 17, 2012

Cranberry and Pistachio Brownies

Lately, I thought that I haven't made brownies in quite a while now. I brought these to the office together with this cake last Monday. Trish Deseine's brownie recipe just is a winner! And you can adapt it the way you like it. This time, I gave it a twist with cranberries and pistachios.


Recipe:
(adapted from Trish Deseine - I love Cake)

90g butter
120g dark chocolate
2 eggs, beaten
225g sugar
90g flour
50g whole unsalted pistachios
50g dried cranberries

Preheat the oven to 180°C and line a brownie tin of about 18x23cm with parchment paper.

Slowly melt the chocolate together with the butter. Let cool slightly. Then, add the eggs and then the sugar and the flour. Beat fast but carefully. Then, add the pistachios and the cranberries. Fill the batter into your prepared tin and bake for about 25 minutes. The top should be crunchy but inside the brownies should be soft and gooey. Let cool (you can also serve them warm together with ice cream for instance) and cut into squares. Enjoy!


Tuesday, November 13, 2012

Chocolate Chip Cream Cheese Bundt Cake

Dani, associate of our team, invited me to his birthday party and - surprise - the first thing I said was: "Yay, I'll bring the cake!" :-) Only that this cake did not even make it to the party... I brought it to the office yesterday morning, together with some brownies, and Dani decided to place it in the kitchen on our floor... So, no cake left for the evening, but we got delicious nibbles at the Times restaurant in Zurich. Thanks Dani for a perfect start into the week!


Recipe
(adapted from the lovely Technicolor Kitchen. Recipe seems familiar to you?! It's the same basic recipe as here, it can be modified in various ways)

315g all purpose flour
1 ¼ teaspoons baking powder
½ teaspoon salt
¾ teaspoon ground cinnamon
170g unsalted butter, at room temperature
250g cream cheese, at room temperature
375g granulated sugar
3 eggs, at room temperature
1 teaspoon vanilla extract
150g dark chocolate chips
a good handful of toasted almond slivers
confectioners’ sugar, for dusting

For the glaze:
100ml heavy cream
100g dark chocolate, grated or chopped into small chunks

Preheat oven to 180°C. Butter and flour a 12-cup Bundt pan.

Sift the flour, baking powder, salt into a bowl.

Using a stand mixer with the paddle attachment, beat the butter, cream cheese, and sugar on medium-high speed until the mixture is very light in color – almost white – and the texture is fluffy, about 8 minutes. Scrape the bottom and sides of the bowl once or twice during the process to ensure that the butter is evenly incorporated. Add the eggs, one at a time, scraping the sides of the bowl after each addition. Beat in the vanilla. With the mixer on low speed, add the dry ingredients; stop mixing as soon as the flour is incorporated. Fold the chocolate chips and the almonds in by hand using a stiff spatula, then scrape the batter into the prepared pan and smooth the top.

Bake for 45-55 minutes or until golden and risen and a skewer inserted in the middle comes out clean. Let the cake cool for 15 minutes over a wire rack, then carefully unmold onto the rack. I usually let Bundt cakes cool completely in the pan and then release them. Dust with icing sugar before serving or make the chocolate glaze: Bring 100ml cream to the boil, then take away from the heat and stir in the chocolate. Pour over your cake.


Sunday, November 04, 2012

Chestnut Muffins

I'm spending a lot of time in the kitchen these days. It's so much fun to try out new recipes with all the lovely food that is in season now... Especially, pumpkin and chestnuts! That's what I really really love about fall! I have a sweet chestnut recipe for you. It's dead easy and quick to make. These muffins are not too heavy and they were the perfect Sunday treat for me, mum and Wolfgang.


Recipe
(Original recipe in German: here)

180g soft butter
120g sugar
1 teaspoon vanilla extract
200g chestnut purée
0.5dl milk
3 eggs
140g flour
20g cornstarch
1/2 sachet baking powder
100g dark chocolate
100ml cream

Preheat the oven to 180°C. Line a 12-mould muffin pan with paper cases.

Put the butter, sugar and vanilla extract in a bowl and beat with an electric hand mixer until fluffy (about 8 minutes). In another bowl, mix chestnut purée and milk with the electric hand mixer. Then, add the eggs and beat until you have a smooth batter. Add this to the butter-mixture and combine well.

Sift together flour, cornstarch and baking powder. Mix until well combined. Then, fill your batter into the prepared paper cases with two tablespoons (a piping bag works well, of course).

Bake for about 20-25 minutes. Then, take out of the oven. Let cool. For the glaze, bring the cream to the boil in a small saucepan. When boiling, take away from the heat and mix in the chopped chocolate. Stir until the chocolate has melted. Spread your glaze onto the muffins. Sprinkle with sugar pearls if you like.


Wednesday, October 31, 2012

Ricotta Tart with Vermicelli Pasta

Snow came down on this last weekend in October. And I don't know what it is this year, but I really like it! After having spent two days at a yoga workshop, for me, this very rich and sweet Italian tart was just the thing on Sunday evening! Who said that carbs are a bad thing anyway?!

I had bookmarked this recipe a long time ago because I always thought that it sounded interesting. Pasta the sweet way - something else for a change, and it really works. As I said, the tart is rather heavy, so cut into small pieces. You can alway have a second one if need be...


Recipe
(from: Pasta Passion by Ursula Ferrigno)

for the pastry:
225g butter, soft
175g caster sugar
4 egg yolks
450g plain flour, some more for dusting

for the filling:
450g ricotta cheese
115g caster sugar
1 tsp ground cinnamon
grated zest and juice of 1 lemon
4 tbsp orange water (you can also use orange juice)
115g candied orange or mixed peel
1 free-range egg, separated
550ml milk
175g vermicelli
a large pinch of salt
icing sugar, for dusting

For the pastry put the butter and sugar in a bowl and cream together. Add the egg yolks and then gradually add the flour, mixing well to make a soft dough. Wrap in cling film and chill in the fridge for about 30 minutes.

Preheat the oven to 190°C. To make the filling, put the ricotta, sugar (reserving 2 tablespoons), cinnamon, half a lemon zest, the lemon juice, the orange flower water, candied peel and the egg yolk in a bowl and beat together.

In a small saucepan, bring the milk to the boil. Add the vermicelli and the remaining sugar and lemon zest with the salt and simmer gently until the vermicelli have absorbed nearly all the milk.

While it is still warm, blend the pasta carefully into the ricotta mixture. Whisk the egg white until it just holds its shape, then fold into the mixture.

On a lightly floured surface, roll out the pastry and use two thirds of it to line a 28cm diameter tart tin. Ferrigno writes that it is a "very short pastry" and that it might tear readily. The dough really isn't easy to work with, but you can patch it together easily.

Add the ricotta filling. Ferrigno uses the other third of the dough to cut it into stripes an to arrange the strips in a lattice pattern over the top of the tart. I decided to cut out little butterflies instead because I simply didn't manage to roll the dough out into large enough disks to cut into long strips.

Bake in the oven for 40-50 minutes until golden. Dust with icing sugar before serving. You can eat it warm or cold. I liked it a lot when it was still a little warm.


Friday, October 19, 2012

Plum and Almond Tart

I finally found a rectangular tart tin! I had been searching for one for ages. It had to be put to use immediately of course :-) I can't stop raving about this wonderful tart...  It brings some warmth and sweetness to cold autumn days... Enjoy this fresh from the oven. Oh, so lovely...


Recipe
(slightly adapted from: Food and Travel Magazine Aug/Sept 2012)

For the filling:
80g butter
80g caster sugar
80g ground almonds
1 egg, beaten
1 tbsp plain flour
a pinch of salt

320g ready-rolled sheet of puff pastry
10 ripe plums (the original says apricots)
4-5 nuggets of candied ginger, coarsly chopped
1 egg
1 tbsp milk
1 tbsp toasted flaked almonds
2 tbsp icing sugar

Preheat the oven to 190°C.

Beat together the butter, sugar, ground almonds and egg until smooth. Add the flour and a pinch of salt and stir until fully incorporated.

Roll out the puff pastry and trim into a rectangle a bit larger than your tin. Lay into the tart tin. Fold in a 1cm band of pastry around the edges, prick the center of the tart with a fork, and leave to chill for about 20 minutes.

Spread the almond mixture onto the base. Halve and stone the plums and arrange them on top, cut-side down, two abreast. Scatter over the candied ginger.

Beat together the egg and milk to form an egg wash and brush over the pastry.

Bake for about 20-25 minutes, until light golden. Brush on more egg wash and sprinkle with almonds. Dust with icing sugar and serve in slices.


Sunday, October 14, 2012

Honey and Walnut Cake

Yesterday, I had Christina over, new colleague from my office. You can't help but adore that woman for her straightforwardness. And for her laughter! Evelyn and I finally got backup! Although it would be big fun, it's probably still better that the three of us don't share an office. We went for lunch together lately and I guess we entertained the whole cafeteria... :-) Christina and I went for a long walk yesterday and had tea and this lovely cake afterwards. It's a wonderful autumn-treat. The addition yogurt to the dough and the honey syrup it is soaked with after baking make it moist and tender. The nuts add a crunch. Instead of walnuts, you could also use pecans.


Recipe
(from one of my new favorites: The Hummingbird Bakery - Süsse Sünden)

190g soft butter, plus some more for greasing the pan
190g sugar
3 eggs
190g flour, plus some for the pan
1 teaspoon baking powder
1/4 teaspoon salt
25g yogurt
1 sachet of vanilla sugar
2 tablespoons runny honey
60g walnuts, coarsly chopped

Preheat the oven to 170°C (convection oven 150°C). Grease a 20cm cake tin and dust with flour.

In a bowl, beat butter and sugar until fluffy. Add the eggs one by one. Scrape down the bowl with a ladle from time to time.

Sift flour, baking powder and salt into a bowl. Add the flour to the fluffy batter in two portions. When all is well combined, add yogurt, vanilla sugar and 1 tablespoon of honey. Then, add the walnuts and incorporate with a ladle.

Fill your dough into the prepared tin. Bake in the middle of the oven for 50-60 minutes. Test if the cake is done by inserting a wooden skewer. If it comes out clean, the cake is done.

Pour 50ml of water and 1 tablespoon honey into a small saucepan and bring to the boil. Let cook until the liquid has reduced by half. When you take the cake out of the oven, pour the syrup over it. Let cool in the tin first. Then, release from the tin and let cool completely.


Wednesday, October 10, 2012

Upside-Down Fig Tart

It's getting colder... time for such heart-warming sweet treats like this one. You will not be able to cut this tart into neat pieces. No one will mind the mess, though... This tart is just wonderful! Serve warmish and add a scoop of vanilla ice cream... perfection.


Recipe
(my beloved Tender II by Nigel Slater)

for the pastry:
175g cold butter
225g plain flour
2 large egg yolks
2 level tablespoons sugar

for the filling:
75g butter
75g sugar
10 figs, halved and tough stems removed

You need a tarte Tatin mould, a metal-handled frying pan or sauté pan about 20-23cm in diameter.

To make the pastry, cut the cold butter into cubes, then rub it into the flour until the mixture resembles fine fresh breadcrumbs. You can do this by hand or with the food processor. Add the egg yolks and the sugar. Then, bring the mixture together into a ball with your hands. Wrap into cling film and refridgerate for about 20 minutes.

Set the oven to 220°C. Melt the butter and the sugar in the tarte Tatin mould or the pan over moderate heat, stirring from time to time. When the mixture looks syrupy and is starting to color, add the figs, cut-side down. Let them cook for three to five minutes until they are soft and start to darken. Remove the pan from the heat.

Now, if you have a tarte Tatin mould or an oven-proof pan, you may leave the figs in this pan. Otherwise, you can transfer the figs to a tart tin which is what I did. Then, roll out your pastry and make a circle a bit larger than the pan. Fold the extra pastry over to make a double "rim" around the edge. Place the pastry rim-side down on top of the figs (the best was to move this pastry is to wrap it lightly around the rolling pin, then carefully lift it on to the pan). Place in the oven and bake for about forty minutes, until the pastry is a deep biscuit color. Take out of the oven and leave it to calm down a bit. Cut into slices and serve straight from then pan.


Monday, October 08, 2012

Rice and Quinoa Salad with Sweet Potato

Ottolenghi's Plenty is one of those books that I kept looking at in book stores time and again thinking that I want to buy it at some point. No need for that anymore since Sarah got it for me as a present. I put it to use the weekend after my birthday party and made my own version of Ottolonghi's Quinoa salad with dried Iranian lime. That is - without dried Iranian lime :-) What I like about Ottolenghi's recipes is that, if you're a more or less experienced cook, you can use them as an inspiration and modify them the way you like it.


Recipe
(from Yotam Ottolenghi - Plenty)

2 medium sweet potatoes, about 350g each (I used 3)
110ml olive oil
200g mixed basmati rice with wild rice (I used plain basmati rice)
200g quinoa (I used red quinoa)
4 garlic cloves (I'm not that much into garlic, so I used 2 only)
3 tbsp shredded sage leaves
3 tbsp roughly chopped oregano
2 tbsp ground dried Iranian lime (I omitted that)
6 tbsp shredded mint
4 spring onions, green parts only, thinly sliced (I omitted these)
1 tsp lemon juice
160g feta, broken into pieces
salt and pepper

Preheat the oven to 200°C. Peel the sweet potatoes and cut them into roughly 2cm dice. Spread on a baking tray lined with greaseproof paper, drizzle over half the oil and sprinkle with salt and pepper. Roast for about 20-25 minutes, or until tender.

Meanwhile, cook the basmati (and wild) rice as instructed on the packet; drain. Place the quinoa in a pan with plenty of boiling water and simmer for 9 minutes; drain in a fine sieve. When dry (but still warm), transfer the rice and the quinoa to a large mixing bowl.

Pour the remaining oil into a small frying pan to heat up, then fry the garlic for about 30 seconds, or until it turns light golden. Add the sage and oregano and stir as you fry for about a minute. Watch closely and make sure that the herbs or the garlic don't burn. Pour the contents of the pan over the rice and quinoa. Add the roast sweet potato with its oil.

Add the lime powder (if you have any), mint, spring onions, lemon juice, feta, some salt and pepper. Toss everything together gently and try not to mesh up the sweet potato and the feta. Taste and adjust the seasoning. Serve warmish or at room temperature, garnish with spring onions.

This salad keeps in the fridge for about two days. I took my leftovers to the office for lunch.

Saturday, October 06, 2012

Berry Muffins

I didn't bake this week. But I have another recipe for you from my baking session of last week. It's an easy one, because, as I said, when I'm baking during weekdays, I don't have the nerves to try complicated and time-consuming recipes. That's what my weekends are for ;-)


Recipe
(from: The Hummingbird Bakery - Süsse Sünden)

300g flour
150g sugar
1 sachet vanilla sugar
1 tablespoon baking powder
1/2 teaspoon baking soda
1/4 teaspoon salt
2 eggs
250ml milk
85g butter, melted
50g blueberries, fresh or frozen
50g raspberries, fresh or frozen

Preheat the oven to 190°C (convection oven: 170°C). Line a 12-mould muffin pan with paper cases. Also prepare some extra paper cases or use a second muffin pan. I ended up with about 20 muffins.

Sift flour, 120g sugar, vanilla sugar, baking powder, baking soda and salt into a large bowl. Mix eggs with the milk and beat well. Slowly, with an electric hand mixer, add the egg-milk-mixture to the dry ingredients and beat until well combined. Scrape down the bowl with a ladle. In the end, add the melted butter.

With a spoon, add the berries to the dough and mix with a ladle until the berries are evenly spread. Fill your paper cases with the dough to about two thirds. Sprinkle with the remaining sugar.

Bake the muffins in the middle of the oven for about 25-30 minutes until they are golden brown and a wooden skewer inserted into the muffins comes out clean.

Let them cool in the pan for about ten minutes. Then, release from the pan and let cool on a wire rack.


Sunday, September 30, 2012

Lavender and Honey Teacakes

Look at these cute little cakes! Well, if that isn't the perfect treat for an afternoon tea on a rainy Sunday in fall?! And let me tell you about fantastic taste of these teacakes... Honey and lavender are a match made in heaven. The addition of sour cream gives the cakes a wonderfully soft and moist texture. The lemon juice in the glaze adds just a bit of a sour kick to counter the warm sweetness of the honey. Need I say more to convince you that you should definitely try this recipe! It's an easy one. And if you don't have such a fancy tin for mini-bundts, just use a normal muffin pan or mini-cake cases.


Recipe
(from Ottolenghi - The Cookbook)

225g butter, soft, plus melted butter for greasing the tins
115g caster sugar
115g lavender honey, or otherwise plain honey (lavender honey is available at Coop for instance)
3 eggs
245g plain flour
1 tsp baking powder
1/2 bicarbonate of soda
1/2 tsp salt
1/2 tsp ground cinnamon
1/2 tsp chopped dried lavender, plus extra to finish
110ml sour cream

For the glaze:
20ml lemon juice
2 tsp honey
about 100g icing sugar

Preheat the oven 170°C. Leave 6 small bunt tins in the fridge for a few minutes, then remove and brush with plenty of melted butter. Return them to the fridge.

Cream the butter, sugar and honey together until pale and fluffy, using an electric mixer. Break the eggs into a cup and beat them with a fork. Gradually add them to the creamed mixture while constantly beating.

Sift together the flour, baking powder, bicarbonate of soda, salt and cinnamon. Then, stir in the dried lavender. Fold the flour mixture into the cream mixture in three additions, alternating with the sour cream.

Either pipe or spoon the mixture into the tins, filling them to about 1.5cm from the top. Level out the mix and clean the edges of the tins if necessary. Place in the oven and bake for about 25-30 minutes, until a skewer inserted in the center of a cake comes out clean. Remove them from the oven and leave in their tins for 10 minutes, then turn out on to a wire rack and leave to cool completely.

For the glaze, mix the lemon juice and the honey together in a small bowl, then whisk in enough icing sugar to make a thick, pourable glaze. Use a pastry brush or a spoon to coat the top of the cakes, allowing the icing to drip down the sides. Sprinkle with a little dried lavender.


Friday, September 28, 2012

Cream Cheese Apple Bundt Cake

When two of our interns at the firm asked me whether I would bake something for them that they might provide for the team as a goodbye-gift, I had to give it some thought since my work days are currently intense and long. Still, I agreed and in fact, the baking in the evening had a relaxing effect and took my thoughts off work. I deliberately chose easy no-fuss recipes such as this one here. The dough is wonderfully smooth and tender. Patricia from Technicolor Kitchen suggests that one might subsitute the apples for berries, add lemon zest or chocolate chips... sounds all good to me ;-)


Recipe
(from the lovely Technicolor Kitchen)

315g all purpose flour
1 ¼ teaspoons baking powder
½ teaspoon salt
¾ teaspoon ground cinnamon
170g unsalted butter, at room temperature
250g cream cheese, at room temperature
375g granulated sugar
3 eggs, at room temperature
1 teaspoon vanilla extract
500g apples, peeled and diced into 1cm (½in) chunks
confectioners’ sugar, for dusting

Preheat oven to 180°C. Butter and flour a 12-cup Bundt pan.

Sift the flour, baking powder, salt, and cinnamon into a bowl.

Using a stand mixer with the paddle attachment, beat the butter, cream cheese, and sugar on medium-high speed until the mixture is very light in color – almost white – and the texture is fluffy, about 8 minutes. Scrape the bottom and sides of the bowl once or twice during the process to ensure that the butter is evenly incorporated. Add the eggs, one at a time, scraping the sides of the bowl after each addition. Beat in the vanilla. With the mixer on low speed, add the dry ingredients; stop mixing as soon as the flour is incorporated. Fold the apples in by hand using a stiff spatula, then scrape the batter into the prepared pan and smooth the top.

Bake for 45-55 minutes or until golden and risen and a skewer inserted in the middle comes out clean. Let the cake cool for 15 minutes over a wire rack, then carefully unmold onto the rack. I usually let Bundt cakes cool completely in the pan and then release them. Dust with icing sugar before serving.


Tuesday, September 25, 2012

Sour Cherry Cupcakes

Here comes my undisputed favourite treat from my party buffet: I’m totally fond of these cute cupcakes! Beware! The frosting is quite heavy... But oh so delicious...


Recipe
(slightly adapted from one of my new favourite books – thanks for the tip Nadina! – Süsse Sünden by Tarek Malouf and the Hummingbird Bakery)

For the cupcakes:
80g soft butter
280g sugar
240g flour
1 tablespoon baking powder
¼ teaspoon salt
2 eggs
240ml milk
150g sour cherries (from the glass), drained and chopped

Preheat the oven to 190°C (convection oven 170°C). Line a 12-mould muffin pan with paper cases.

In a bowl, mix butter, sugar, flour, baking powder and salt with a hand mixer on low speed until you have a “sandy” mass.

Mix eggs and milk. Slowly add about three fourths of this to your batter until it’s blended well. Scrape down the bowl with a ladle. Add the rest of the egg-milk-mixture and beat on middle speed with your electric hand mixer. Fold in the cherries until they are evenly dispersed.

Fill the 12 paper cases (to about two thirds). If you have remaining dough, fill it into more paper cases (I ended up with 16 cupcakes). Bake the cupcakes in the middle of the oven for about 20 minutes until they have risen and the surface is springy. Test if they are done with a wooden skewer. If it comes out clean, your cupcakes are done.

Let cool in the pan for a few minutes. Then, release from the pan carefully and let cool completely.

(Scroll down for the frosting)


In the meantime, prepare your frosting:
500g icing sugar
160g very soft butter
50ml milk
(80g sour cherries, drained and chopped, some left whole for the decoration)

In a bowl, mix icing sugar and butter with a hand mixer on low speed. Slowly add the milk while constantly beating. Then, beat on high speed until you have a light and fluffy batter. At this point, you can add the cherries which I left out. 

Spread the frosting onto your cupcakes. Decorate with remaining sour cherries if you like. Put the cupcakes in a cool place until you serve them.


Sunday, September 23, 2012

White Chocolate and Pistachio Tart

Now let's turn to the sweet treats again! This one here is really something for white chocolate lovers. However, it was more the the pistachios I had in mind when I chose this recipe for my dessert buffet. I wanted to bake something especially for Evelyn who had her birthday two days before my party and who is very fond of pistachios. The lovely green plate I placed the tart on was a present from Jeannine by the way. She brought me four (!) very beautiful plates from a secondhand shop because she thought, I might need some new equipment to "style" my food for my blog. Isn't she cute?! I'm still over the moon.


Recipe
(Original recipe in German: here)

100g butter
200g white chocolate, broken into pieces
120g sugar
1 tablespoon vanilla sugar
1 pinch of salt
2 eggs
120g flour, sifted
120g pistachios, coarsly chopped

Decoration:
icing sugar
2 tablespoons pistachios, chopped

Line a 24cm diameter springform pan with parchment paper and grease the rim with butter. Preheat the oven to 200°C.

Melt the butter in a small pan over middle heat. Add white chocolate und let melt while constantly stirring. Take away from the heat and pour into a bowl. Add sugar, vanilla sugar, salt and eggs and beat until you have a smooth batter. Sift in flour and mix well. Fold in the chopped pistachios.

Pour your batter into the prepared springform pan and bake in the middle of the oven for about 15-20 minutes. The tart should be moist in the middle. Take out of the oven and let cool. Decorate with icing sugar and chopped pistachios. 

The tart keeps for a few days and tastes best after 2 or 3 days.


Wednesday, September 19, 2012

Sweet and Savoury Feta-Plum Cake

I am going to post some of my sweet treats from last Saturday soon. But first, here comes something inbetween savoury and sweet. This cake was probably my favourite part of the savoury buffet. It's cheese and dessert in one. And it's easy and quick to make and you can also prepare it in advance, it keeps for two or 3 days. Trish's Deseine's original recipe requires dried apricots, but dried plums work just as well. Dried figs might also be a yummy option...


Recipe
(slightly adapted from my beloved I love Cake by Trish Deseine)

2 eggs plus 2 egg yolks, beaten
100ml mild olive oil
175g flour
1 teaspoon baking powder
75g brown sugar
75g raisins
150g dried plums
150g feta cheese

Preheat the oven to 180°C. Line a middle-size cake pan with parchment paper.

In a bowl, beat the eggs together with the olive oil with an electric mixer. In another bowl, mix flour, baking powder, sugar, raisin and dried plums. Add the egg-mixture and mix. I worked the mixture with a wooden ladle first, then with my hands. When you have a smooth dough, fill half of it into your prepared pan. Then, break the feta cheese apart and scatter over the mixture. Cover with the rest of your dough.

Bake for about 35-40 minutes, or until the surface is firm and a knife inserted into the cake comes out clean. Take out of the oven, let cool for about ten minutes. Then release from the baking pan and let cool completely.


Tuesday, September 18, 2012

Mini-Quiches with Pancetta, Apples and Gorgonzola

For a change, I have more savoury recipes for you! These mini-quiches are perfect for a party buffet, or you could also take them to a summer-picnic. I really like the combination of the ingredients. The addition of thyme makes thes mini-quiches perfect. I used some from my own herb-garden which smelled amazing.


Recipe
(from: Nicky Stich - delicious days)

Makes 12:

2 red onions
8 slices of pancetta
1 large apple
3-4 twigs of fresh thyme
3 tablespoons butter
freshly ground black pepper
1 large egg
100g cream
100g crème fraiche
salt
freshly ground nutmeg
1 rolled out puff pastry dough (store bought, about 25x40cm)
about 100g gorgonzola dolce

Peel and slice onions. Cut the pancetta into thin slices. Peel and and core the apple, cut into quarters, then into slices. Wash the thyme and pluck the leaves. Put the butter into a frying pan and turn on the heat. Melt butter and add the onions, the pancetta and the apple and sautée over medium heat. Season with salt and pepper, add about half of the thyme. Take away from the heat. Mix the egg with the cream and the créme fraiche in a small bowl. Season with salt, pepper and nutmeg.

Preheat the oven to 180°C (convection oven: 160°C). Grease a muffin pan with butter. Roll out the puff pastry and cut out 12 round pieces that fit into your muffin moulds (I did that with a small glass bowl). Line your muffin moulds with the puff pastry. Fill in the onion-mix, then add a piece of gorgonzola. With a tablespoon, add the egg-cream-mixture. Don't fill up to the brim or they will overspill during the baking. Sprinkle with the rest of the thyme and put in the oven for about 20 minutes. Take out of the oven, let cool in the pan for about 5 minutes, then, carefully take the quiches out of the pan and serve warm or let cool on a wire rack.


Sunday, September 16, 2012

Parmesan and Poppy Biscuits

Yesterday evening, I had my friends and family over for my belated birthday party. I had been looking forward to this for a few weeks and I really enjoyed having them all together in my flat. I haven't seen some of them in quite while. And of course, I had a lot of fun preparing all the food!! Two evenings and one day in the kitchen. Lots of recipes to test... salads, sweet and savoury cakes, brownies, cupcakes... But let's start at the beginning: with the appetizers. Here is a savoury cookie recipe from Ottolenghi's cookbook which is always a great book to turn to when it comes to preparing party food. Stay tuned this week. There's more to come!


Recipe
(from: Ottolenghi - The Cookbook)

210g plain flour, plus plenty extra for dusting
1/2 tsp baking powder
1/2 tsp paprika
a pinch of cayenne pepper
a pinch of salt
1/2 tsp freshly ground black pepper
165g Parmesan cheese, freshly grated
80g poppy seeds
1 free-range egg, beaten

Sift the flour, baking powder, paprika and cayenne into a bowl and add the salt and pepper.

Mix the softened butter with the Parmesan until they are well blended (either by hand or by using a spatula, or in a freestanding mixer fitted with a paddle attachment). Add the dry ingredients and continue mixing until a soft dough is formed.

Put the dough on a well floured work-surface and divide it in half. Use plenty of flour, both on your hands and on the work surface, to roll each piece into a long log (3-4cm in diameter). Wrap each log into cling film and place in the fridge for about 30 minutes to firm up.

Scatter the poppy seeds over a flat plate or rtay. Brush the logs with the beaten egg and then roll then in the poppy seeds until covered. Refridgerate again for one hour (at this stage, you can also wrap the logs and freeze them).

Preheat the oven to 170°C. Line a baking tray with parchment paper. Cut the logs into slices 5-8mm thick and arrange them on the tray, spaced 3cm apart. Bake for 12 minutes. The biscuits should be dark golden. Leave to cool completely before serving, or storing in a tightly sealed container.


Sunday, September 09, 2012

Plum Jam with Star Anise and Pine Nuts

Now is the time to make jam! A way to preserve the taste of all the lovely fruit of late summer. I have spotted some great jam recipes lately. This one here is probably one of my favourite jam recipes ever. Plums and star anise are a great flavour combination. And the color is beautiful, isn't it?!


Recipe
(from: Annemarie Wildeisen's Kochen 9/2012)

For about 4 glasses of 0.25l:

1kg plums
2 star anis
500 jam sugar
juice of 1 lemon
50g pine nuts

Wash the plums and dry with a kitchen towel. Stone the plums and cut into small pieces. Put into a large pan together with the jam sugar and the star anis and let stand for about an hour.

After an hour, add the lemon juice and bring to the boil while constantly stirring. Add the pine nuts. Let cook for about 5 minutes. Fill the boiling jam into cleaned, preheated glasses and seal them. Then turn them upside down for about a minute (kills the fungus spores) and then turn around again and let cool.


Friday, August 31, 2012

Big-Time Peanut Butter Cookies

What happened to my cake-karma?! I messed up a cake this week! Well, it wasn't exactly inedible, but it just didn't turn out the way I expected it... I get grumpy when that happens... So I flipped through one of my new baking books yesterday, in search of something for consolation. "Big-time peanut butter cookies"... can't go wrong with that, I thought. And the recipe keeps its promise, they are easy-peasy and quick to make and they are scrumptious! Moist and nutty, with a chrunch from the peanut chunks and the bitterness of the dark chocolate... big-time!


Recipe
(slightly adapted from: The Weekend Baker by Abigail Johnson Dodge)

284g peanut butter (smooth or crunchy, I took crunchy)
170g firmly packed light brown sugar
1 large egg
1 teaspoon vanilla extract
28g plain flour
170g chocolate chips (I used 78%), or candy coated chocolates such as mini M&Ms (optional)

Line two baking trays with parchment paper. Preheat the oven to 180°C.

In a large bowl, combine peanut butter and sugar. Beat with an electric mixer on middle speed until well blended. Add the egg and the vanilla extract and mix until well blended. Pour in the flour and mix on low speed until well blended. Add the chococlate chips and fold in with a ladle.

Using a small ice-cream scoop or two tablespoons, scoop up rounded tablespoons full of the dough and, using your hands, shape into balls (about 4cm diameter). Arrange the cookies on the baking trays, leaving about 5cm space between them. Flatten them a little with a fork.

Bake one tray at a time until the cookies look dry on top, about 12 minutes. Take out of the oven and let cool onthe tray for 10 minutes. Then, transfer to a wire rack to cool completely.

Makes about 20 cookies. They can be stored in an airtight container in a cool place for about a week. You can also store them in the freezer for up to 3 months.


Related Posts with Thumbnails