Showing posts with label Tarts. Show all posts

Sunday, December 14, 2014

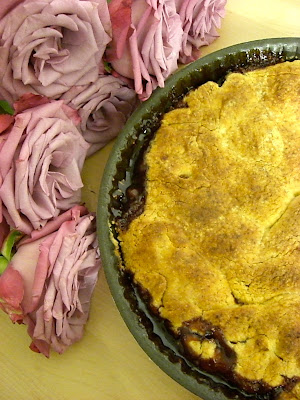
Apple and Cinnamon Crumble Tart

We had my mum and Wolfgang over for dinner tonight to say thanks for all their help. Seriously, I don't know how we would have survived without them during the past few weeks. Almost all the moving boxes have disappeared and our apartment is starting to look really cozy - just in time for Christmas. For dinner, Edi cooked a wonderful pork roast and, as usual, I took care of dessert. When browsing through my baking books, I had some sort of festive cake in mind. This recipe here sounded just right to me (besides, when can you ever go wrong with the combination of apples and cinnamon?!). With a dollop of whipped cream, a slice of this cake is just the right thing on a winter day.


Recipe
(slightly adapted from "Weihnachten mit Fräulein Klein")

for the dough:
125g soft butter
1/2 vanilla pod
110g sugar
2 eggs
125g flour
1 teaspoon baking powder
1 teaspoon ground cinnamon
1 teaspoon grated zest of an orange

for the apples:
2-3 apples (recipe says 4 mid-sized apples, 2 apples were enough in my case)
2 teaspoons ground cinnamon

for the crumble:
150g flour
90g brown sugar
100g butter, cold
1/2 vanilla pod

You can use either a round baking tin of 24cm diameter of a square one (11x35cm). 

In a large bowl, beat butter and sugar and the seeds of half a vanilla pod with an electric hand mixer until fluffy. Add the two eggs and beat again. Add zest of one grated orange and beat. In another bowl, combine flour, baking powder and cinnamon. Add this to your batter and beat until all is well combined. Fill this dough into your tart tin. 

Peel your apples (or don't, we were too lazy for that), core them and cut into 3-4mm slices. Put them into a bowl and combine with the cinnamon. Arrange your apple slices on the dough.

For the crumble, combine flour, sugar and scraped out seeds of a vanilla pod in a bowl. Dice the cold butter, add and with your fingers, rub until your have a crumbly batter. Scatter over your tart.

Bake the tart for about 40-45 minutes. If it tends to brown too much towards the end, cover with aluminium foil. Test with a wooden skewer whether your cake is done.

Take out of the oven, let cool. Dust with icing sugar before serving.

Notes:

  • While my cake was in the oven, I realized that I probably had a bit too much dough for my tin and it spilled over the edges while baking. Nothing to worry too much about, though. I just trimmed the not so nice looking edges with a knife after baking.
  • I also had too much of the crumble batter, so one could probably prepare a little less.
  • Fräulein Klein originally bakes this cake with speculoos spice instead of cinnamon. I even opted for cinnamon buds (Zimtblüte) which I like a lot.


Sunday, September 08, 2013

Liverpool Tart

Here comes something I've never tried before. The recipe for this tart requires you to boil whole lemons for almost two hours until they are very soft. To create the filling, you blend the boiled lemons in a food processor together with butter, sugar and eggs. Liverpool tart is a British treat. According to Google searches, the original recipe dates back to 1897. I was very keen to find out how this tart was going to turn out flavor-wise. Its taste is somewhat different from other lemon tarts which are usually almost overwhelmingly sweet. This filling is very soft and creamy, and it has a very distinctive taste which I would describe as a mixture of sour, bitter and sweet. It might not be everyone's cup of tea, but I liked it a lot - and don't you love its golden color?!


Recipe
(from Marcus Wareing & Chantelle Nicholson: The Gilbert Scott Book of British Food)

Makes 1 tart

Filling: 
4 lemons
150 g unsalted butter
250 g caster sugar
2 free-range eggs

Pastry:
75 g soft unsalted butter
40 g icing sugar
1 free-range egg, beaten
150 g plain flour 
pinch of salt

Put the whole lemons in a pan of water and bring to a gentle boil, then simmer for 1-2 hours, until soft; drain. Place in a blender or food processor with the butter, sugar & eggs and blend together. Set aside.

For the pastry, cream the butter with the icing sugar in a food processor or with an electric mixer until pale and fluffy. Add the egg, then fold in the flour and salt. Roll out to a round 3mm thick to fit a 26cm tart tin that is 2,5cm deep. Transfer to a tray and place in the fridge to rest for 20 min.

Line the tart tin with the pastry, taking care not to stretch it; reserve the pastry trimmings. Put the tart case in the fridge to rest for 20 min.

Preheat the oven to 180C. Line the tart case with baking parchment and fill with baking beans, then bake blind for 25 min. Remove the beans and paper. Patch any holes with the pastry trimmings. Bake for a further 10 min,

Reduce the oven temperature to 165C. Fill the tart case with lemon mixture. Bake for 20-25 min, until lightly golden; there should still be a slight wobble in the centre of the filling. Leave to cool before serving.


Saturday, June 29, 2013

Apricot Tartlets with Pine Nuts

Apricots probably are my favorite summer fruit. Sadly, I have never been able to eat raw stone fruit without getting a stomach ache. I can only eat them if they're cooked. That means, once they're transformed into a cake, it's no problem anymore. That's why, in summer, apricot cakes usually make an appearance on my dessert plate more than only once. Here comes a wonderful tart recipe with a vanilla-flavored filling. The pine nuts could also be substituted by almonds, but I suggest you go with the pine nuts! I love their flavor and it's a really nice variation of the usual apricot-almond combo.


Recipe
(from the lovely Fräulein Klein's "Die wunderbare Welt von Fräulein Klein")

30g pine nuts (you can also use ground almonds)
100g cold butter
70g icing sugar
1 egg
200g flour
1/2 vanilla pod

100g white chocolate
250g crème fraiche
100g cream
1/2 vanilla pod
2 tablespoons sugar

400g apricots, washed, cut into slices
1 Tablespoon sugar
20g pine nuts

1 egg yolk

For the tart dough (if you're to lazy to do that, you can use store-bought): Roast the pine nuts (30g) and grind. Alternatively, you can use ground almonds. Put ground pine nuts, flour and seeds of the vanilla pod in a bowl and mix. Add egg, cold butter and icing sugar. You can either form a dough using your hands or - as I usually do - using a food processor. Form the dough into a ball, cover in cling film and refrigerate for about an hour.

Preheat the oven to 180°C. Prepare either a 24cm diameter tart tin or about 8 little tart tin. I used aluminium tins which you don't have to line with parchment paper or grease with butter or anything. Roll out your dough until about 3mm thick. Line your tins with the dough. Put the tins back in the refrigerator until you have the filling ready.

Melt the white chocolate over a hot water bath. Beat cream together with the seeds of the other half of the vanilla pod. Put crème fraiche into a bowl together with the sugar and mix until smooth. Add the melted chocolate and mix. Then, fold in the cream. Fill your tart shells.

Spread your apricot slices on the tartlets and brush with egg yolk around the edge. Scatter some sugar over the tartlets. Bake for 20 minutes. After ten minutes, scatter the pine nuts over the tartlets and bake for another 10 minutes.


Monday, May 20, 2013

Apple Nougatine Tart

"Apple Nougatine Tart"... Doesn't that sound delicious already?! This tart is about as wonderful as its name sounds. You will have to put some effort into this, but it's totally worth it, I swear! The home-made flaky crust is divine. Store-bought dough just wouldn't do. Caramelizing the apples takes a bit of patience, but it's quite a joyous thing to do and what you get out of it is a mouth-watering filling. Good news: The crunchy almond topping is really easy to make. Just mix the ingredients, spread on your tart and you're good to go.


Recipe
(from the lovely Tartine by Elisabeth M. Prueitt and Chad Robertson)

Flaky Tart Dough (Recipe yields two 25cm tart or pie shells):

1tsp salt
150ml water, very cold
455g flour
300g butter, very cold

In a small bowl, add salt to the water and stir to dissolve. Keep very cold until ready to use.

To make the dough, put flour in a large bowl. Cut the butter into pieces and scatter over the flour. You can rub it together with your hands or pulse this in a food processor. When the mixture forms large crumbs and there are still butter pieces the size of peas left, add the water-and-salt mixture and knead with your hands or pulse again in the food processor until you have a more or less smooth dough. It's no problem if there are still butter chunks left. 

On a floured surface, divide the dough into two equal balls and shape each ball into a disk. Wrap in cling film and cool for about two hours or over night. You can freeze one of these and use it another time.

Preheat the oven to 190°C. Take the dough out of the fridge and roll out on a floured surface. Lift and rotate the dough every few strokes to discourage sticking and work quickly. Transfer the disk to a tart tin (25cm diameter) that is lined with parchment paper.

Cover the dough with parchment paper and then with beans or chickpeas and blind bake for about 25 minutes, until lightly brown. Take out of the oven, remove the parchment paper with the beans or chickpeas and bake for another 5 minutes until golden brown. Then, let cool completely.


For the filling:

1.6kg apples (I only had 1kg, but that was no problem, I had enough filling in the end.)
55g butter
70g sugar
a pinch of salt
lemon juice and grated zest of half a medium lemon

Preheat the oven to 170°C and have the tart shell ready.

To make the filling, halve, core, peel and slice the apples, mixing them together in a large bowl. Have an empty bowl ready for the sautéed apples. Sauté the apples in 3 or 4 batches, depending on how large your pan is. Divide the butter and the sugar into the number of batches you think you'll need for sautéing.

Melt the butter in your sauté pan over high heat. Add the sugar and allow it to caramelize; the mixture will darken as it caramelizes. If the sugar is caramelizing unevenly, stir with a wooden spoon; otherwise, just let it cook. Carefully add the apples to your pan an a single layer and sauté until soft, turning a few times with the spoon. You want about half the apples to become very soft and the other half to hold their shape. The timing depends on the types of apples and the thickness of the slices. When the apples are ready, transfer to your bowl.

Don't clean the pan between the batches; the sugar and bits of apple in the bottom of them pan will caramelize and add more flavor. Melt more butter, add sugar and caramelize again. It won't take as long as the first time. Repeat until all your apples are sautéed. When all the apples are cooked, deglaze the pan by increasing the heat to high and letting it become very hot. Add a few large spoonfuls of water and scrape up the caramel and bits from the bottom of the pan. Let the juices reduce and then pour them over the apples.

When all the apples have been cooked, mix them well with lemon juice, zest and salt and pile them into the pre-baked pastry shell. Smooth the top of the apples with the back of the spoon.  


For the topping:

100g sliced almonds
100g sugar
2 large egg whites
a pinch of salt

To make the topping, combine the almonds, sugar, egg whites and salt in a small mixing bowl and stir well. Using a spoon, spread the topping evenly over the apples. 

Bake the tart until the topping is browned, about 30 minutes. Then, let cool completely before serving. The tart will keep in the refrigerator for up to 4 days.


Wednesday, October 31, 2012

Ricotta Tart with Vermicelli Pasta

Snow came down on this last weekend in October. And I don't know what it is this year, but I really like it! After having spent two days at a yoga workshop, for me, this very rich and sweet Italian tart was just the thing on Sunday evening! Who said that carbs are a bad thing anyway?!

I had bookmarked this recipe a long time ago because I always thought that it sounded interesting. Pasta the sweet way - something else for a change, and it really works. As I said, the tart is rather heavy, so cut into small pieces. You can alway have a second one if need be...


Recipe
(from: Pasta Passion by Ursula Ferrigno)

for the pastry:
225g butter, soft
175g caster sugar
4 egg yolks
450g plain flour, some more for dusting

for the filling:
450g ricotta cheese
115g caster sugar
1 tsp ground cinnamon
grated zest and juice of 1 lemon
4 tbsp orange water (you can also use orange juice)
115g candied orange or mixed peel
1 free-range egg, separated
550ml milk
175g vermicelli
a large pinch of salt
icing sugar, for dusting

For the pastry put the butter and sugar in a bowl and cream together. Add the egg yolks and then gradually add the flour, mixing well to make a soft dough. Wrap in cling film and chill in the fridge for about 30 minutes.

Preheat the oven to 190°C. To make the filling, put the ricotta, sugar (reserving 2 tablespoons), cinnamon, half a lemon zest, the lemon juice, the orange flower water, candied peel and the egg yolk in a bowl and beat together.

In a small saucepan, bring the milk to the boil. Add the vermicelli and the remaining sugar and lemon zest with the salt and simmer gently until the vermicelli have absorbed nearly all the milk.

While it is still warm, blend the pasta carefully into the ricotta mixture. Whisk the egg white until it just holds its shape, then fold into the mixture.

On a lightly floured surface, roll out the pastry and use two thirds of it to line a 28cm diameter tart tin. Ferrigno writes that it is a "very short pastry" and that it might tear readily. The dough really isn't easy to work with, but you can patch it together easily.

Add the ricotta filling. Ferrigno uses the other third of the dough to cut it into stripes an to arrange the strips in a lattice pattern over the top of the tart. I decided to cut out little butterflies instead because I simply didn't manage to roll the dough out into large enough disks to cut into long strips.

Bake in the oven for 40-50 minutes until golden. Dust with icing sugar before serving. You can eat it warm or cold. I liked it a lot when it was still a little warm.


Friday, October 19, 2012

Plum and Almond Tart

I finally found a rectangular tart tin! I had been searching for one for ages. It had to be put to use immediately of course :-) I can't stop raving about this wonderful tart...  It brings some warmth and sweetness to cold autumn days... Enjoy this fresh from the oven. Oh, so lovely...


Recipe
(slightly adapted from: Food and Travel Magazine Aug/Sept 2012)

For the filling:
80g butter
80g caster sugar
80g ground almonds
1 egg, beaten
1 tbsp plain flour
a pinch of salt

320g ready-rolled sheet of puff pastry
10 ripe plums (the original says apricots)
4-5 nuggets of candied ginger, coarsly chopped
1 egg
1 tbsp milk
1 tbsp toasted flaked almonds
2 tbsp icing sugar

Preheat the oven to 190°C.

Beat together the butter, sugar, ground almonds and egg until smooth. Add the flour and a pinch of salt and stir until fully incorporated.

Roll out the puff pastry and trim into a rectangle a bit larger than your tin. Lay into the tart tin. Fold in a 1cm band of pastry around the edges, prick the center of the tart with a fork, and leave to chill for about 20 minutes.

Spread the almond mixture onto the base. Halve and stone the plums and arrange them on top, cut-side down, two abreast. Scatter over the candied ginger.

Beat together the egg and milk to form an egg wash and brush over the pastry.

Bake for about 20-25 minutes, until light golden. Brush on more egg wash and sprinkle with almonds. Dust with icing sugar and serve in slices.


Wednesday, October 10, 2012

Upside-Down Fig Tart

It's getting colder... time for such heart-warming sweet treats like this one. You will not be able to cut this tart into neat pieces. No one will mind the mess, though... This tart is just wonderful! Serve warmish and add a scoop of vanilla ice cream... perfection.


Recipe
(my beloved Tender II by Nigel Slater)

for the pastry:
175g cold butter
225g plain flour
2 large egg yolks
2 level tablespoons sugar

for the filling:
75g butter
75g sugar
10 figs, halved and tough stems removed

You need a tarte Tatin mould, a metal-handled frying pan or sauté pan about 20-23cm in diameter.

To make the pastry, cut the cold butter into cubes, then rub it into the flour until the mixture resembles fine fresh breadcrumbs. You can do this by hand or with the food processor. Add the egg yolks and the sugar. Then, bring the mixture together into a ball with your hands. Wrap into cling film and refridgerate for about 20 minutes.

Set the oven to 220°C. Melt the butter and the sugar in the tarte Tatin mould or the pan over moderate heat, stirring from time to time. When the mixture looks syrupy and is starting to color, add the figs, cut-side down. Let them cook for three to five minutes until they are soft and start to darken. Remove the pan from the heat.

Now, if you have a tarte Tatin mould or an oven-proof pan, you may leave the figs in this pan. Otherwise, you can transfer the figs to a tart tin which is what I did. Then, roll out your pastry and make a circle a bit larger than the pan. Fold the extra pastry over to make a double "rim" around the edge. Place the pastry rim-side down on top of the figs (the best was to move this pastry is to wrap it lightly around the rolling pin, then carefully lift it on to the pan). Place in the oven and bake for about forty minutes, until the pastry is a deep biscuit color. Take out of the oven and leave it to calm down a bit. Cut into slices and serve straight from then pan.


Sunday, September 23, 2012

White Chocolate and Pistachio Tart

Now let's turn to the sweet treats again! This one here is really something for white chocolate lovers. However, it was more the the pistachios I had in mind when I chose this recipe for my dessert buffet. I wanted to bake something especially for Evelyn who had her birthday two days before my party and who is very fond of pistachios. The lovely green plate I placed the tart on was a present from Jeannine by the way. She brought me four (!) very beautiful plates from a secondhand shop because she thought, I might need some new equipment to "style" my food for my blog. Isn't she cute?! I'm still over the moon.


Recipe
(Original recipe in German: here)

100g butter
200g white chocolate, broken into pieces
120g sugar
1 tablespoon vanilla sugar
1 pinch of salt
2 eggs
120g flour, sifted
120g pistachios, coarsly chopped

Decoration:
icing sugar
2 tablespoons pistachios, chopped

Line a 24cm diameter springform pan with parchment paper and grease the rim with butter. Preheat the oven to 200°C.

Melt the butter in a small pan over middle heat. Add white chocolate und let melt while constantly stirring. Take away from the heat and pour into a bowl. Add sugar, vanilla sugar, salt and eggs and beat until you have a smooth batter. Sift in flour and mix well. Fold in the chopped pistachios.

Pour your batter into the prepared springform pan and bake in the middle of the oven for about 15-20 minutes. The tart should be moist in the middle. Take out of the oven and let cool. Decorate with icing sugar and chopped pistachios. 

The tart keeps for a few days and tastes best after 2 or 3 days.


Monday, May 28, 2012

Mushroom Tart

We found it! The perfect shortcrust recipe. Until now, I have always made shortcrust by hand. Rubbing the cold butter into the flour is rather strenuous for my hands and I was never fully content with the results I got. Either the dough was a bit too firm or too crumbly which made it more difficult to roll it out. The recipe below advises to make the dough with a food processor which I have never done before. We were delighted with the result! A super-smooth dough which is rather easy to roll out. The filling of this tart is easy to make and not too heavy. If you like mushrooms, this tart is going to be a winner! Goes well with a salad. Perfect for a light summer dinner.


Recipe
(from Elle à Table N°82)

Pâte Brisée (Shortcrust)
250g flour
1 egg
150g butter, cold
2 pinches of salt
1 teaspoon sugar
6 tablespoons cold milk

Put the flour, sugar, salt and the butter, cut into small cubes, into a food processor and mix on high speed. Then, add the egg and the milk and mix again until all is well incorporated. If the dough is too liquid, add a bit of flour. Then, transfer your dough onto a floured surface, knead shortly with your hands and form into a ball. Flatten a little and wrap in cling film. Put in the refrigerator for at least half an hour.


Mushroom Filling and assembling the Tart:
500g mushrooms (champignons, we took about 350g champignons and 150g oyster mushrooms)
1 tablespoon flour
1 tablespoons olive oil
20g butter
a pinch of cayenne pepper
1 heaped tablespoon of crème fraiche
1 handful of spinach leaves
125g ricotta
ground pepper

Preheat the oven to 180°C. Line a tart tin (about 25cm diameter) with parchment paper or grease well.

If your mushrooms are dirty, clean them by brushing them, you should not wash them with water, they will get soaky. Cut them in quarters. Heat up the olive oil and the butter in a large frying pan, add the mushrooms and fry them for about 5 to 10 minutes or so. In the meantime, you can cut your dough in two halves. Roll out the first one and place into your tart tin. Perforate the dough with a fork. Transfer the mushrooms into a bowl. Add the flour, crème fraiche, ricotta, spices and the spinach leaves and mix well. Pour into your tart tin. Then, roll out the second half of the dough into a disc and place onto your tart. Cut it crosswise in the middle with a knife so that the steam may evaporate. You can also pull open the wedges of dough so that you get a bigger hole in the middle (see picture below). I think, the tart lookes really nice like that. However, you can also only make one disc of shortcrust and leave out the second one to cover the tart.

Bake for about 40-50 minutes, until the dough is golden brown.


Thursday, May 10, 2012

Tartlets - Dark Chocolate vs. Banana and Hazelnut

There was still sweet pastry left from this baking session. You can easily freeze sweet pastry, so you can make a big amount of it at once and keep any leftovers for another time. Ever since I started making shortcrust myself, I don't really like the store-bought pastry anymore. Last weekend was all about Ottolenghi tartlets. I still can't make up my mind which filling I like better... chocolate or banana-hazelnut... both extremely delicious...


Pre-baked Tartlet Cases

The recipe for the sweet pastry is the same as in this post.

330g plain flour
100g icing sugar
grated zest of 1/2 a lemon
1/4 teaspoon salt
180g cold butter, cut into small cubes
1 egg yolk
2 tablespoons cold water

Put the flour, icing sugar, lemon zest and salt in a bowl and add the butter. Rub it in with your hands (or do it with a mixer or food processor). Mix until you get a coarse breadcrumb consistency, make sure that there are no large lumps of butter left.

Add the egg yolk and water and mix just until the dough comes together. Don't mix longer than necessary. Maybe you need a tiny amount of extra water.

Remove the dough from the mixing bowl and knead lightly for a few seconds only. Shape it into a smooth disc (5-6cm thick). Wrap in cling film and chill until ready to use. The pastry keeps in the fridge for about a week and at least a month in the freezer.

Grease you tartlet tins with butter. Since I don't really have tartlet tins, I used aluminium tins that I bought at our grocery store Migros, these are of about 10cm diameter. I imagine you could try and use a muffin tin.

Roll out your dough (2-3mm thick) and cut out circles with a pastry cutter or the rim of a bowl. Line your tartlet cases with the dough and put them in the fridge for about 30 minutes.

Preheat the oven to 150°C. Line each pastry case with a circle of parchment paper and full up with rice or dry beans. Place in the oven and bake blind for about 20 - 25 minutes. They should take a golden-brown color. Remove from the oven and leave to cool.

Fillings: 

Banana and Hazelnut (for 6 pre-baked tartlet cases)

45g unskinned hazelnuts (or you can just use store-bought ground hazelnuts)
90g butter
100g icing sugar
40g plain flour
2 egg whites
1/2 tsp vanilla essence
50g mashed banana
2 tsp lemon juice
6 pre-baked tartlet cases

Heat the oven to 150°C. Scatter the hazelnuts in an oven tray and roast for twelve minutes. Remove and let cool down.

While you wait for the nuts, make some burnt butter. Put the butter in a medium pan and cook over moderate heat. After a few minutes, it should start to darken and smell nutty. Take off the heat and leave to cool slightly.

Set aside 10g of the nuts. Put the rest in a food processor, together with 70g of the icing sugar. Work to a fine powder, then add the flour. Pulse together to mix. Add the egg whites and work the machine very briefly, just to mix them in. Repeat with the vanilla and the butter. It is important to stop the machine as soon as the ingredients are incorporated.

Mix the mashed banana with the lemon juice and the remaining icing sugar. Spoon about two teaspoons of this mixture into each pre-baked tart case. Top with the hazelnut batter. It should come to within 2-3mm of the top. Place in the oven and bake for 20-22 minutes, until the hazelnut filling is completely set. You can check this with a skewer. Remove the tarts from the oven and cool slightly, then remove from the tins.

You can brush these with heated apricot jam, decorate them with chocolate glaze, top it with crushed hazelnuts or dust them with icing sugar... whatever you feel like.


Dark Chococlate (for 6 pre-baked tartlet cases)

150g dark chocolate
100g unsalted butter, diced
1 egg
1 egg-yolk
30g sugar
60g raspberry jam (we used apricot jam), optional
6 pre-baked tartlet cases
cocoa powder for dusting

Preheat the oven to 170°C. Put the chocolate and butter in a bowl, set it over a pan of simmering water and leave to melt. Whisk the egg and yolk with the sugar until thick and pale yellow, then fold this into the melted chocolate.

If you use them jam, put a spoonful in the base of each tartlet case. Fill them up with the chocolate mix; it should reach right up to the rim. Place in the oven and bake for 5 minutes. Cool a little, then remove the tartlets from their tins and allow them to cool down completely (if you can...).

Lightly dust with cocoa powder and serve at room temperature.


Monday, April 30, 2012

Semolina and Raspberry Tart

Semolina pudding makes you think of your childhood... it is comfort food. Put it in a pastry shell and you end up with the most lovely tart. The semolina filling is wonderfully smooth and creamy and has this warming smell of vanilla. The sweetness of the raspberries builds a perfect contrast to this. The tart has been bookmarked in my Ottolenghi cookbook for way too long - good thing Alex, who probably knows this book by heart, reminded me of it this weekend. Ottolenghi calls this tart "the pinnacle of comfort". So true. Instant smiles on the faces of those who eat it. And don't be put off by the long recipe instructions, it's worth it.


Recipe
(from: Ottolenghi - The Cookbook)

For the sweet pastry: (you can use store-bought pastry if you don't want to make it yourself)
330g plain flour
100g icing sugar
grated zest of 1/2 a lemon
1/4 teaspoon salt
180g cold butter, cut into small cubes
1 egg yolk
2 tablespoons cold water

Put the flour, icing sugar, lemon zest and salt in a bowl and add the butter. Rub it in with your hands (or do it with a mixer or food processor). Mix until you get a coarse breadcrumb consistency, make sure that there are no large lumps of butter left.

Add the egg yolk and water and mix just until the dough comes together. Don't mix longer than necessary. Maybe you need a tiny amount of extra water.

Remove the dough from the mixing bowl and knead lightly for a few seconds only. Shape it into a smooth disc (5-6cm thick). Wrap in cling film and chill until ready to use. The pastry keeps in the fridge for about a week and at least a month in the freezer.

You won't need the whole amount of this sough for the tart. I just froze the rest and will use it for another tart.

For the tart:

vegetable oil for brushing the tin
plain flour for dusting
250g sweet pastry (or store-bought pastry)
80g unsalted butter
180ml whipping cream
345ml milk
60g caster sugar
1/2 vanilla pod
60g semolina
1 egg
200g raspberries
50g apricot jam (optional)
icing sugar, for dusting

Lightly brush a 18cm loose-bottomed cake tin with a tiny amount of oil and set aside. You could probably also use a 20cm cake tin.

Make sure you have a clean work surface. Dust it with a bit of flour and, using a rolling pin, roll out your dough. You should have a disk that is about 2-3mm thick. Once you have reached the right thickness, cut the pastry into a circle large enough to cover the tin and most of the sides comfortably. Carefully line the tin and patch up any holes with excess pastry if necessary. Once you lined your tin, trim the pastry with a sharp knife, so you have a nice edge, about 3cm high. Place in the fridge for about 30 minutes.

Preheat the oven to 170°C. Cut out a circle of baking parchment large enough to cover the base and the sides of your cake tin. Place inside the case and fill up with dry beans or rice so that the sides of the pastry are totally supported by the beans and wont collapse during baking. Bake the case blind for 25-35 minutes or until it is very light brown. Remove from the oven and take out the beans of rice (you can keep it for future tarts).

To make the filling, put the butter, cream, milk and sugar in a saucepan. Slit the vanilla pod open lengthwise with a sharp knife and scrape out all the seeds. Drom them and the scraped pod into the saucepan. Place the saucepan onto the stove and bring to the boil. Let it simmer while you slowly whisk in the semolina. Continue whisking until the mix comes back to the boil and thickens up like porridge. Remove from the heat and whisk in the egg. Remove the vanilla pod.

Pour the semolina mixture into the pasty case. Push half the raspberries inside, allowing them to show on the surface. Bake for 20-25 minutes, until the filling is slightly golden. Remove from the oven and cool slightly before removing the tart from the tin.

Put the apricot jam in a small pan with a tablespoon of water and bring to the boil. Strain it through a sieve and brush over the tart. Finish with the remaining raspberries and dust with icing sugar.


Related Posts with Thumbnails